Soil moisture sensor V3.0
Post ReplySoil moisture sensor V3.0Posted: Monday, July 16, 2018 [10:44:24] - 1
Latest design is more compact and uses ATtiny13a as a switch that turns power off and only turns it back on every 15 minutes for 10 seconds, just enough to collect sensor data and send it over WiFi. 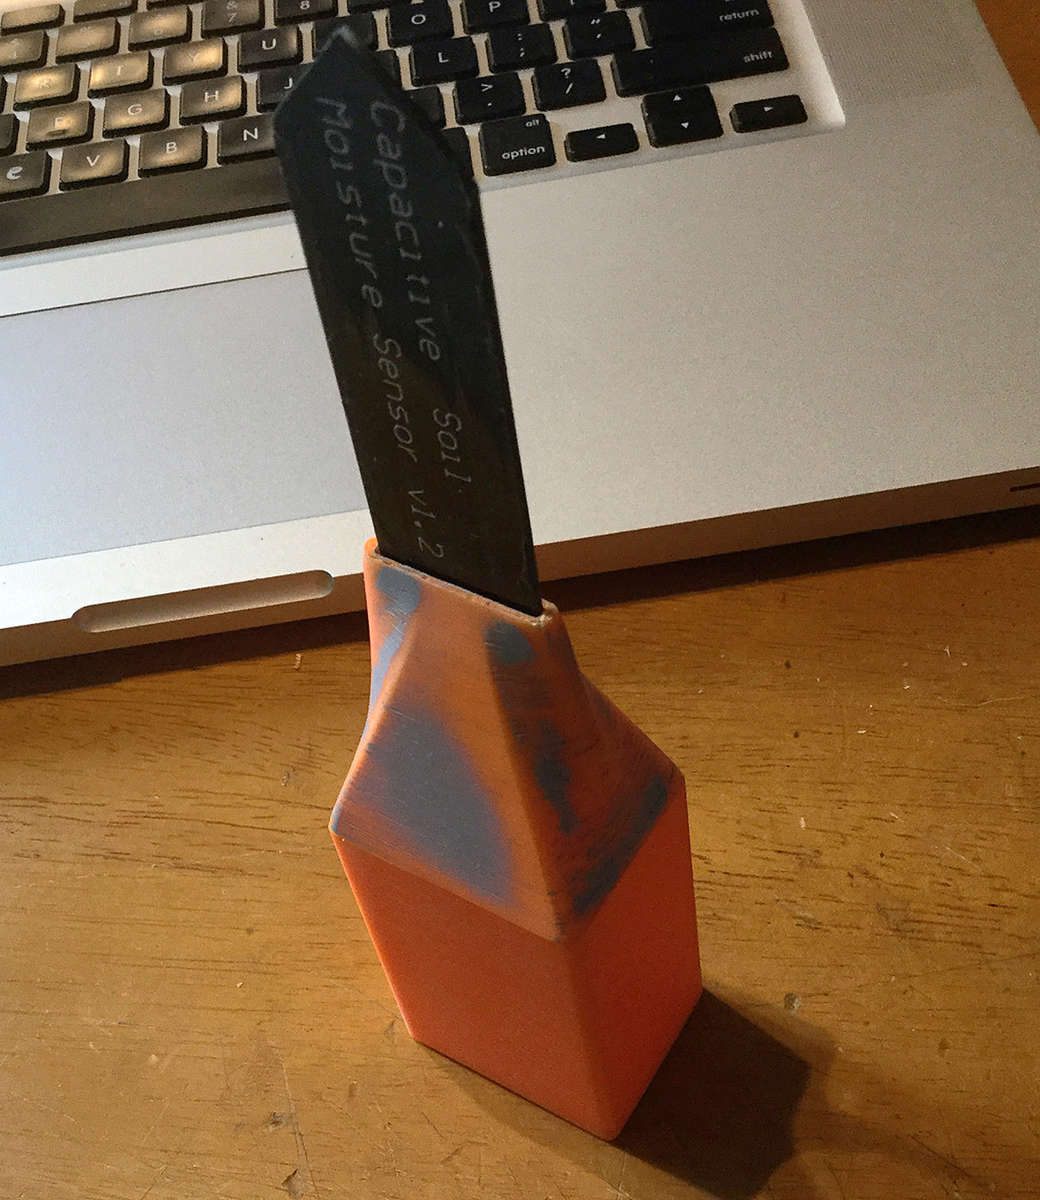 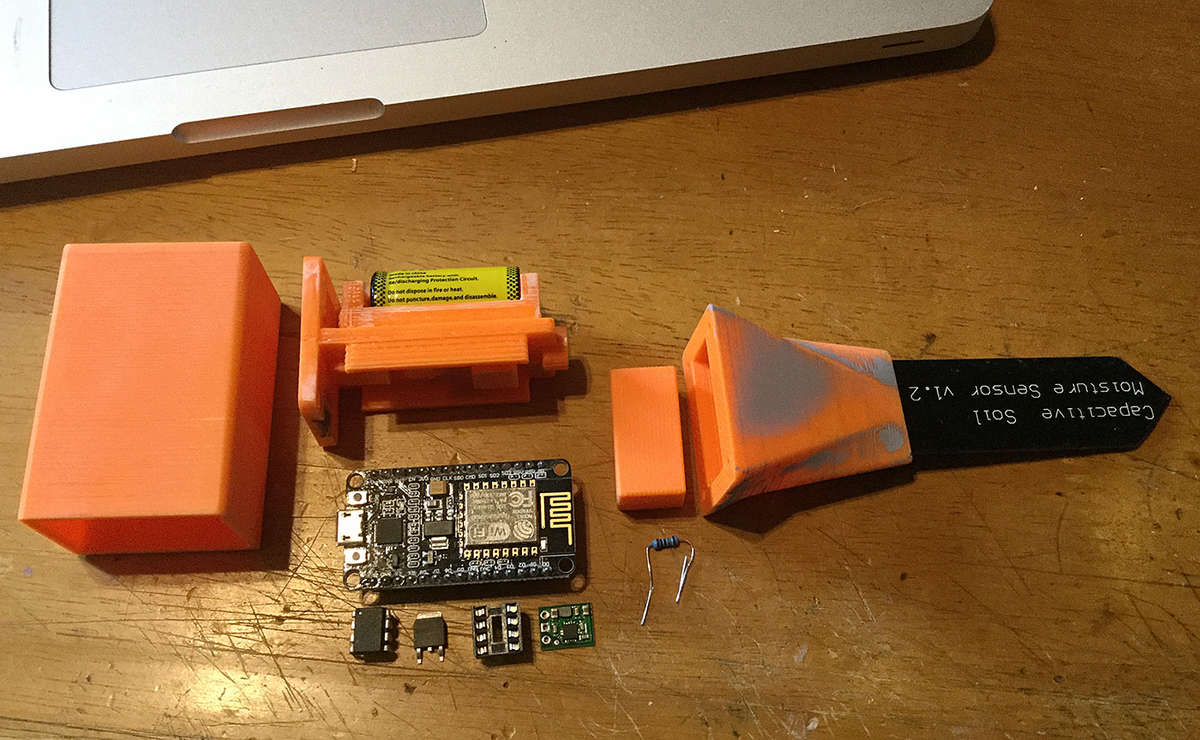 This is NOT an IoT project - it is an Intranet of Things project. Actual data never leaves the house but accessible from the Internet. We feel that IoT is a bad thing to share your private information with the companies like Microsoft, Cisco etc. we do not know much about. All data processing and signaling is done on local Mac which in-tuns controls RPis over SSH. |
 Posted by:
Programming ATtiny13APosted: Monday, July 16, 2018 [11:19:10] - 2
ATtiny13A chip is used to control MOSFET and turns off the power to ESP8266. The whole circuit is based on "Home Circuits" blog: homecircuits.eu/blog/batt.. Here is a sketch for ATtiny13A: #include <avr/sleep.h> // Pin 4 has an mosfet connected on most Arduino boards. int mosfet = 4; // interrupt counter int count = 0; ISR(WDT_vect) { digitalWrite(mosfet, LOW); // turn the mosfet off - keep it off count = count +1; if (count >111) //roughly 15 minutes sleep { digitalWrite(mosfet, HIGH); // turn the mosfet on (HIGH is the voltage level) till the next interrupt delay(3000); count = 0; } } // the setup routine runs once when you press reset: void setup() { // initialize the digital pin as an output. pinMode(mosfet, OUTPUT); (ADCSRA &= ~(1<<ADEN)); // disable ADC (before power-off) // ADC uses ~320uA digitalWrite(mosfet, HIGH); // turn the mosfet on (HIGH is the voltage level) delay(3000); count = 0; //SET timer for 8s WDTCR |= (1<<WDP3 )|(0<<WDP2 )|(0<<WDP1)|(1<<WDP0); // 8s // Enable watchdog timer interrupts WDTCR |= (1<<WDTIE); sei(); // Enable global interrupts // Use the Power Down sleep mode set_sleep_mode(SLEEP_MODE_PWR_DOWN); for (;;) { sleep_mode(); // go to sleep and wait for interrupt... } } // the loop routine runs over and over again forever: void loop() { // wait for a second } /* Values for the watchdok interrupt 16MS (0<<WDP3)|(0<<WDP2)|(0<<WDP1)|(0<<WDP0) 32MS (0<<WDP3)|(0<<WDP2)|(0<<WDP1)|(1<<WDP0) 64MS (0<<WDP3)|(0<<WDP2)|(1<<WDP1)|(0<<WDP0) 125MS (0<<WDP3)|(0<<WDP2)|(1<<WDP1)|(1<<WDP0) 250MS (0<<WDP3)|(1<<WDP2)|(0<<WDP1)|(0<<WDP0) 500MS (0<<WDP3)|(1<<WDP2)|(0<<WDP1)|(1<<WDP0) 1S (0<<WDP3)|(1<<WDP2)|(1<<WDP1)|(0<<WDP0) 2S (0<<WDP3)|(1<<WDP2)|(1<<WDP1)|(1<<WDP0) 4S (1<<WDP3)|(0<<WDP2)|(0<<WDP1)|(0<<WDP0) 8S (1<<WDP3)|(0<<WDP2)|(0<<WDP1)|(1<<WDP0) */ Arduino settings are: Additional Boards Manager URLs raw.githubusercontent.com.. per1234.github.io/Arduino.. Board: "ATtiny13" Processor Version: "ATtiny13" -> ATtiny13a Programmer: "Arduino as ISP" To upload this sketch use: Sketch -> Upload Using Programmer |
First prototypePosted: Sunday, July 22, 2018 [07:23:26] - 3
First prototype is functioning and submitting data. This is all the Soil Moisture sensor parts:  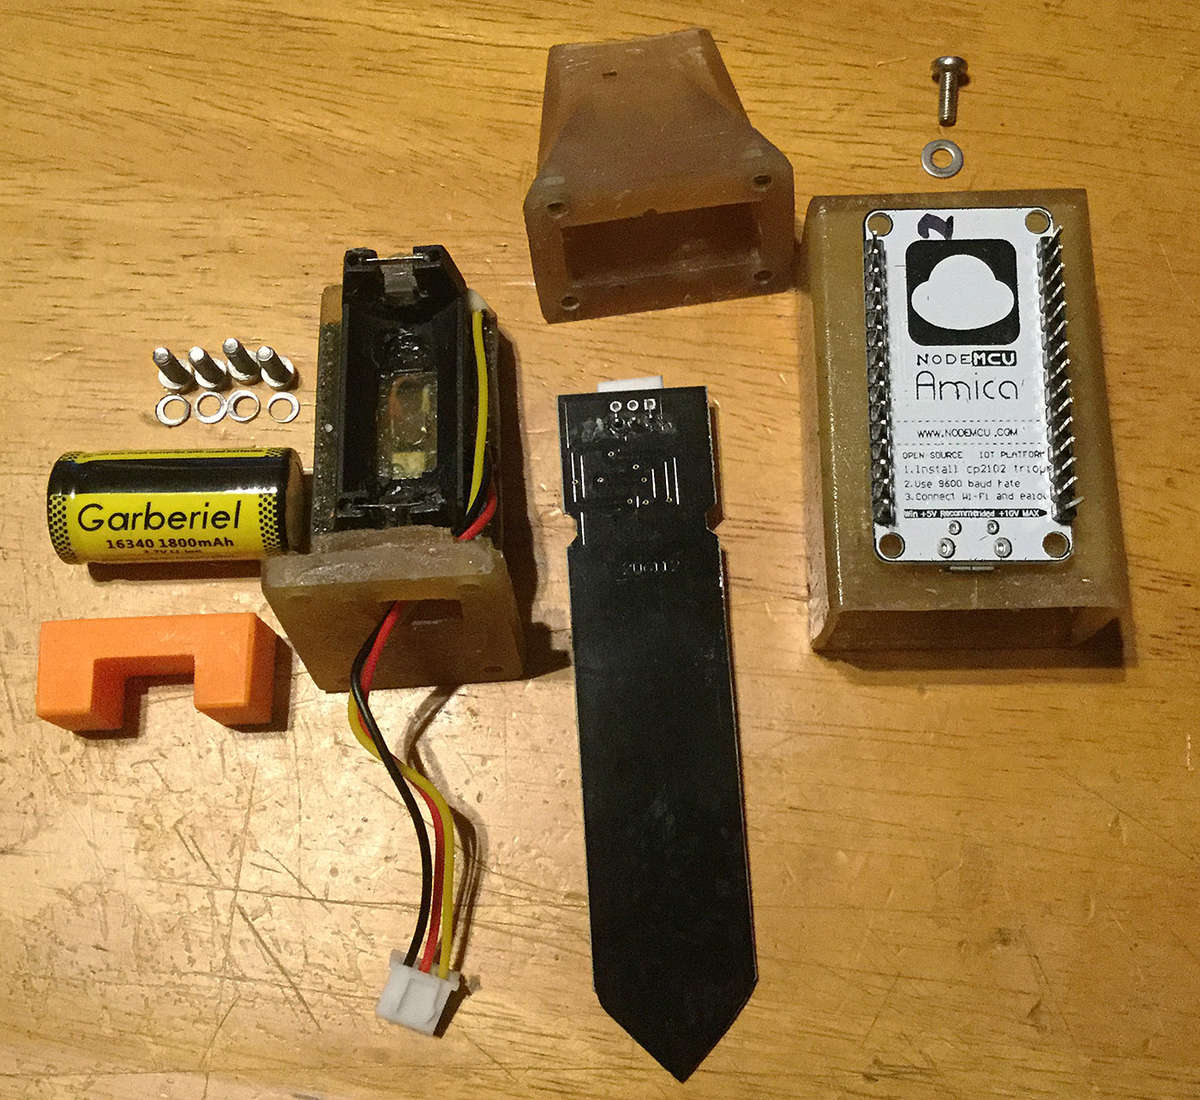 Sensor inserted:  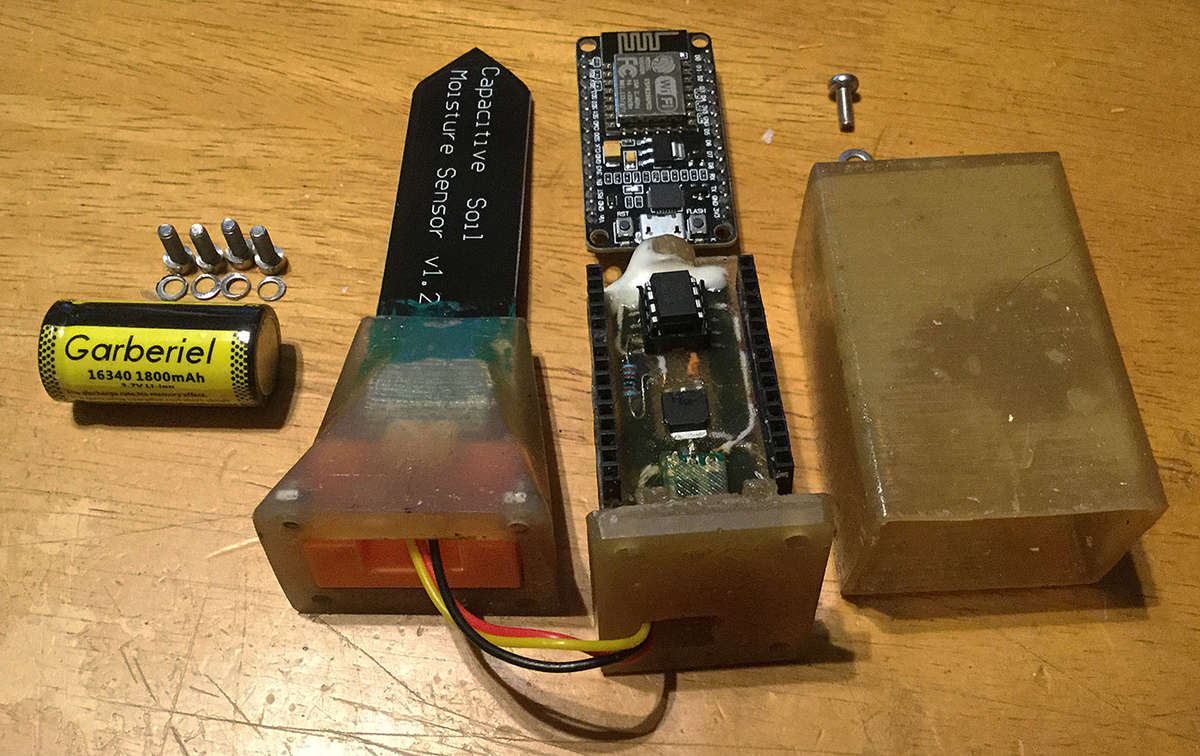 and attached to the body:  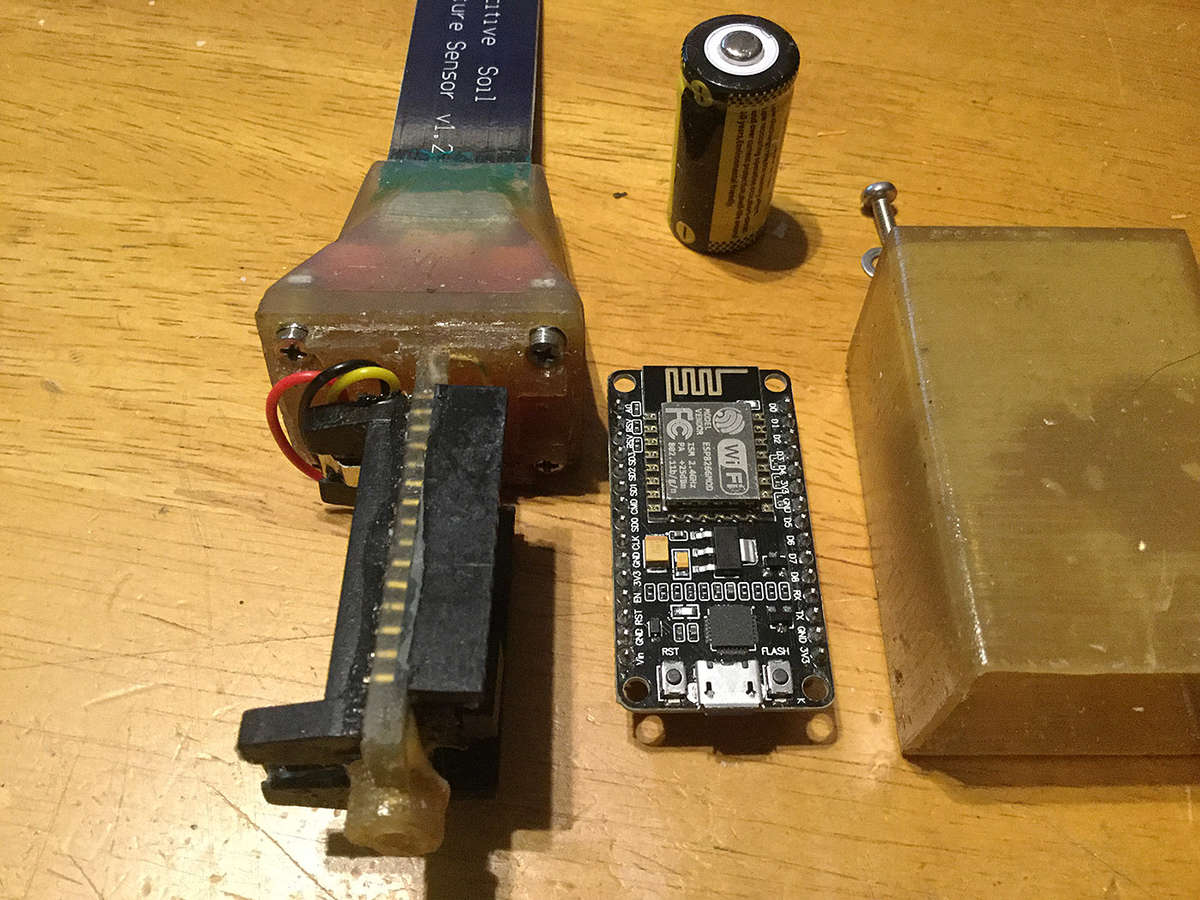 ESP installed: 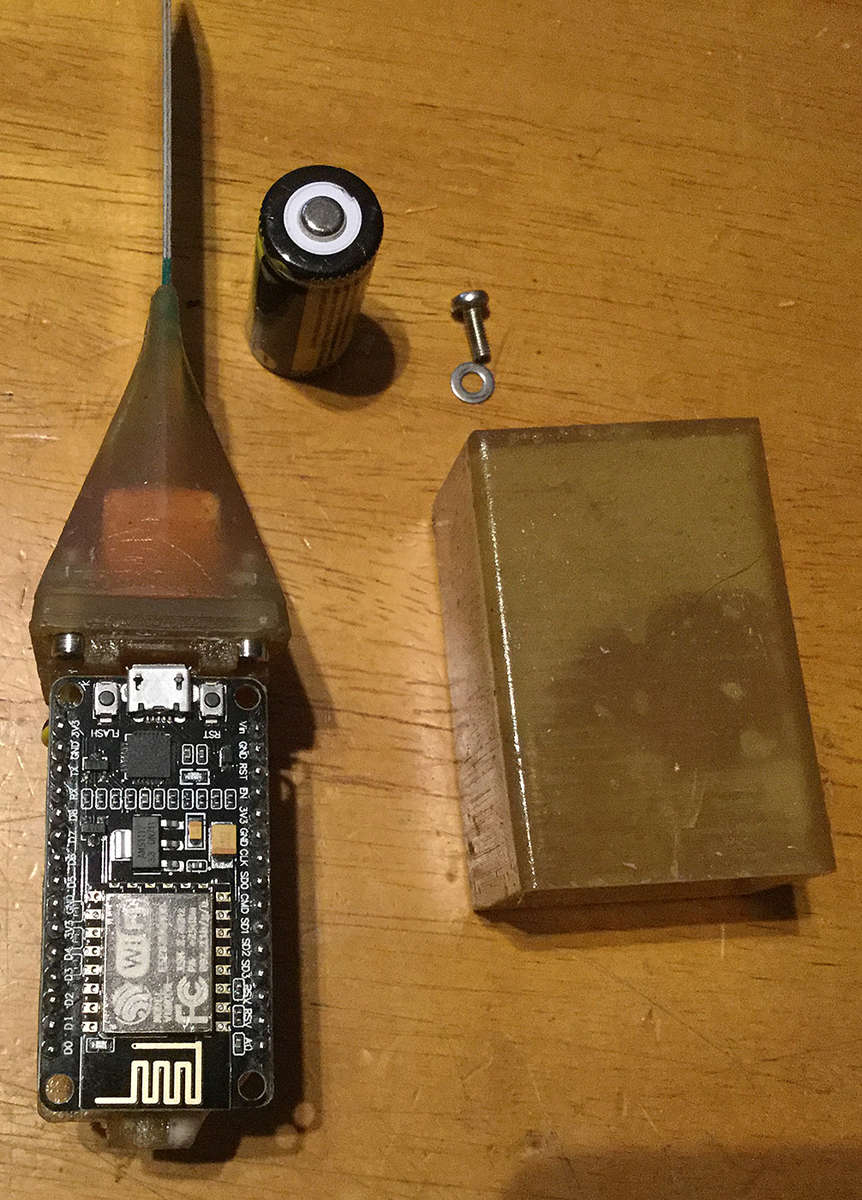 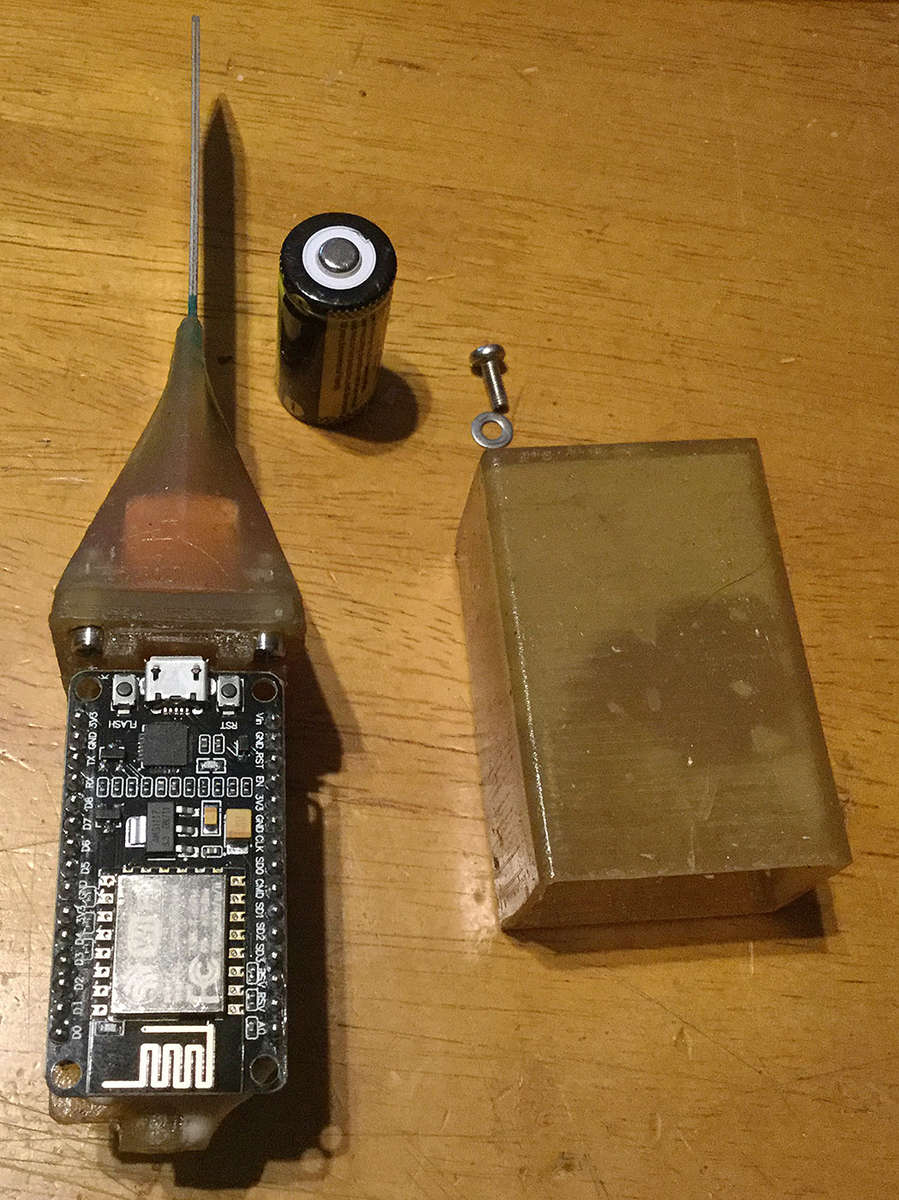  Battery installed: 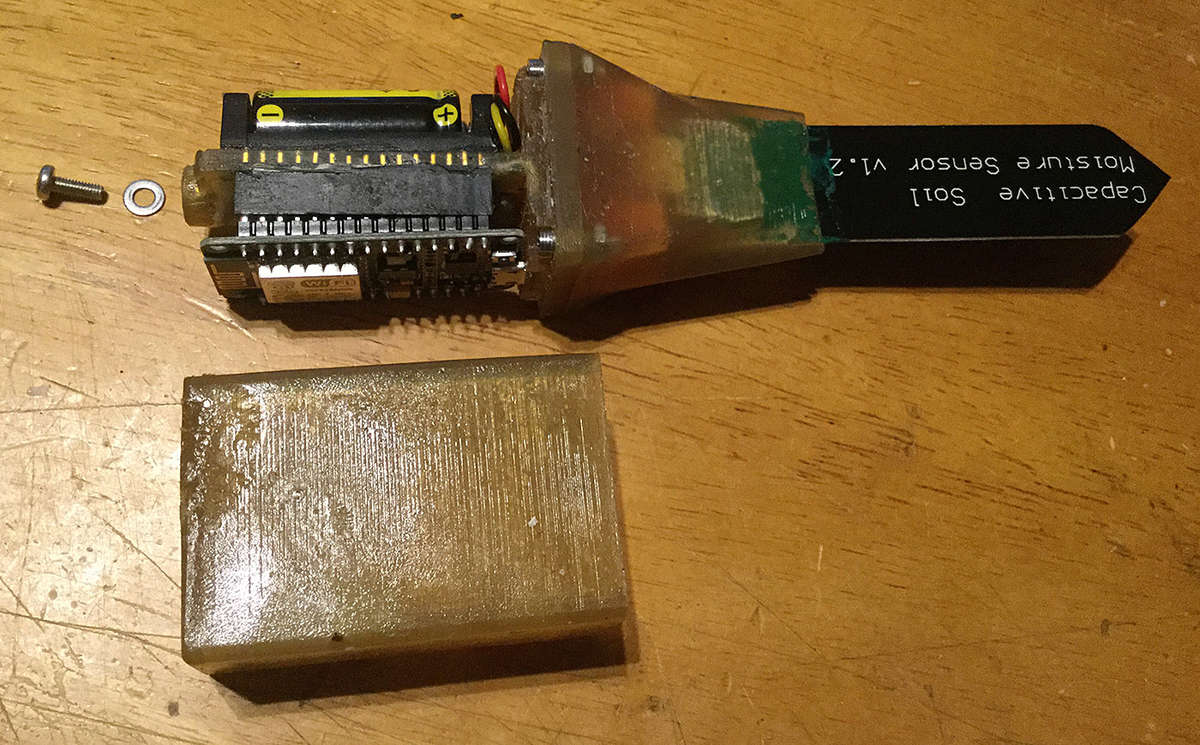  Module fully assembled: Sensor sends data every 16 minutes and then it is powered down by ATtiny13A. |
Soil moisture sensor SchematicsPosted: Wednesday, July 25, 2018 [04:59:27] - 4
Sensor and power connection schematics: 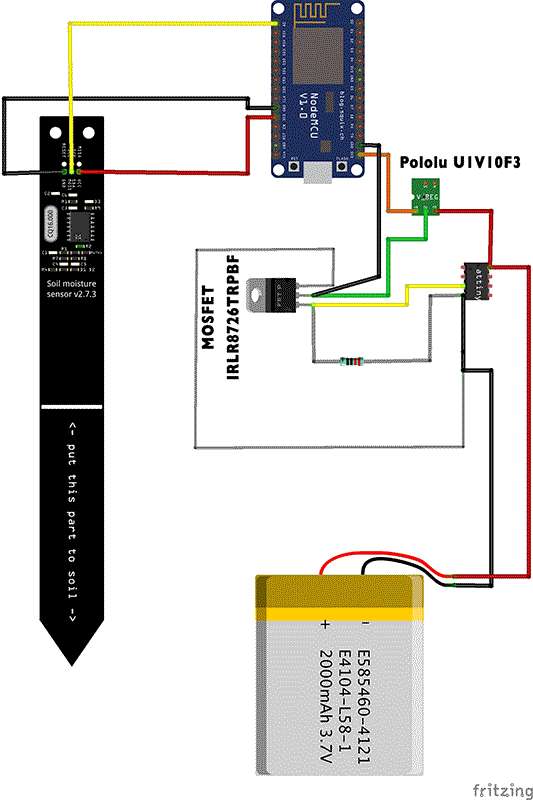 Sorry, some of the components do not match actual components. |
Soil moisture sensor V3.0 PCB orderedPosted: Monday, August 6, 2018 [15:22:51] - 5
After painstakingly soldering together two sensor and failing on a third one I decided to order a PCB for the module. I am new to PCB and schematics, so I had to learn the Eagle software. All fine but I went with EasyEDA online designer: easyeda.com/ I am not associated with EasyEDA in any way. It took me about two hours to design the board. EasyEDA has extensive parts library and I easily found even Pololu voltage regulator there which was not available in Eagle software. Here is the result of my work. And yes, I am newbee in PCB design! 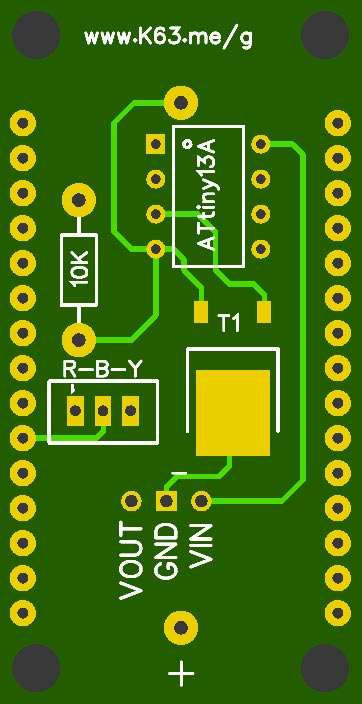  Boards are ordered on JLCPCB.COM directly from EasyEDA website at the end of the design process. 10 boards for US$2.00 + $19.39 S/H (total: $21.39 paid VIA PayPal) with delivery time promised 3-7 day (not Business days). I want to see how that goes. |
Soil moisture sensor V3.0 PCB deliveredPosted: Friday, August 10, 2018 [16:20:33] - 6
Today, August 10, 2018 PCBs package delivered at 1:23PM EDT. Total time from placing the order until it is in my hands four and a half days! Unbelievable! 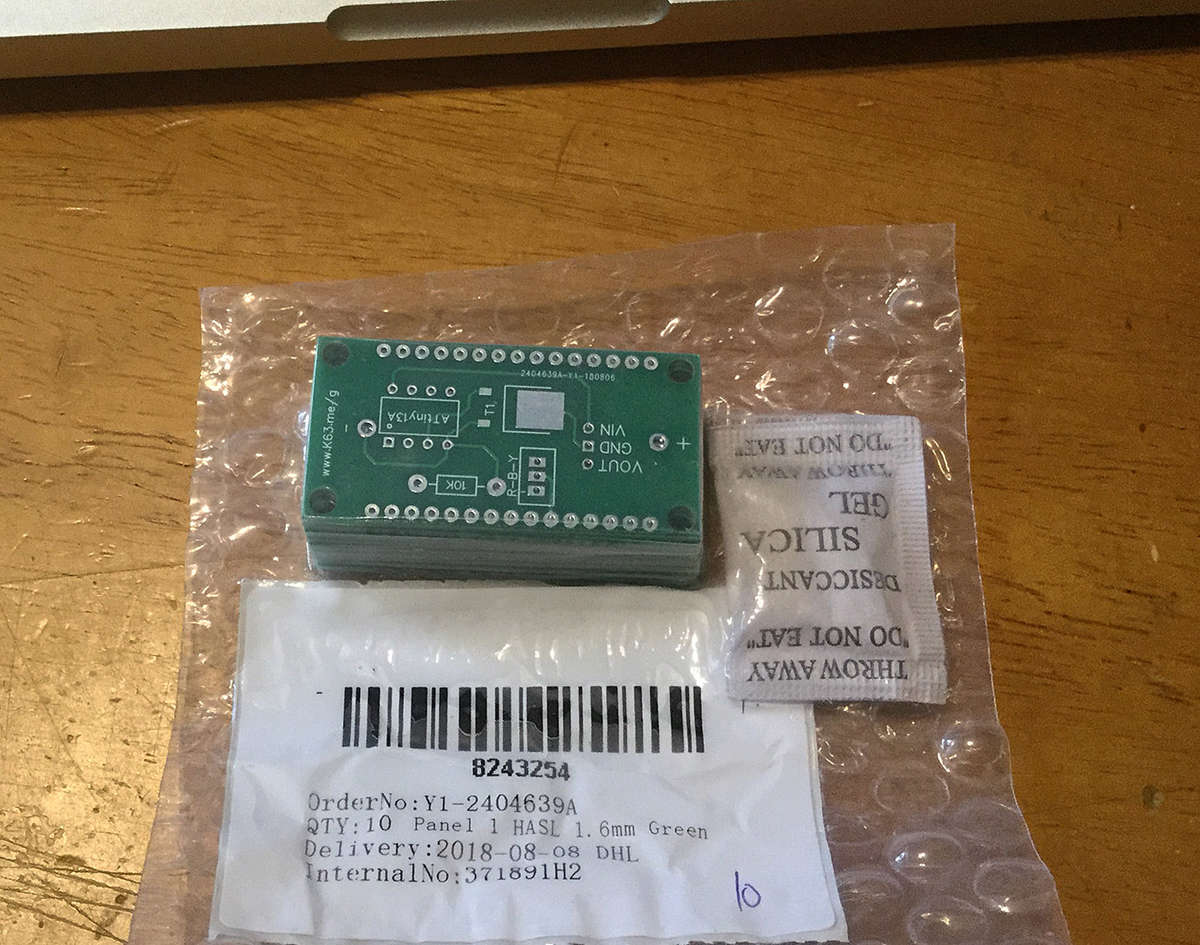 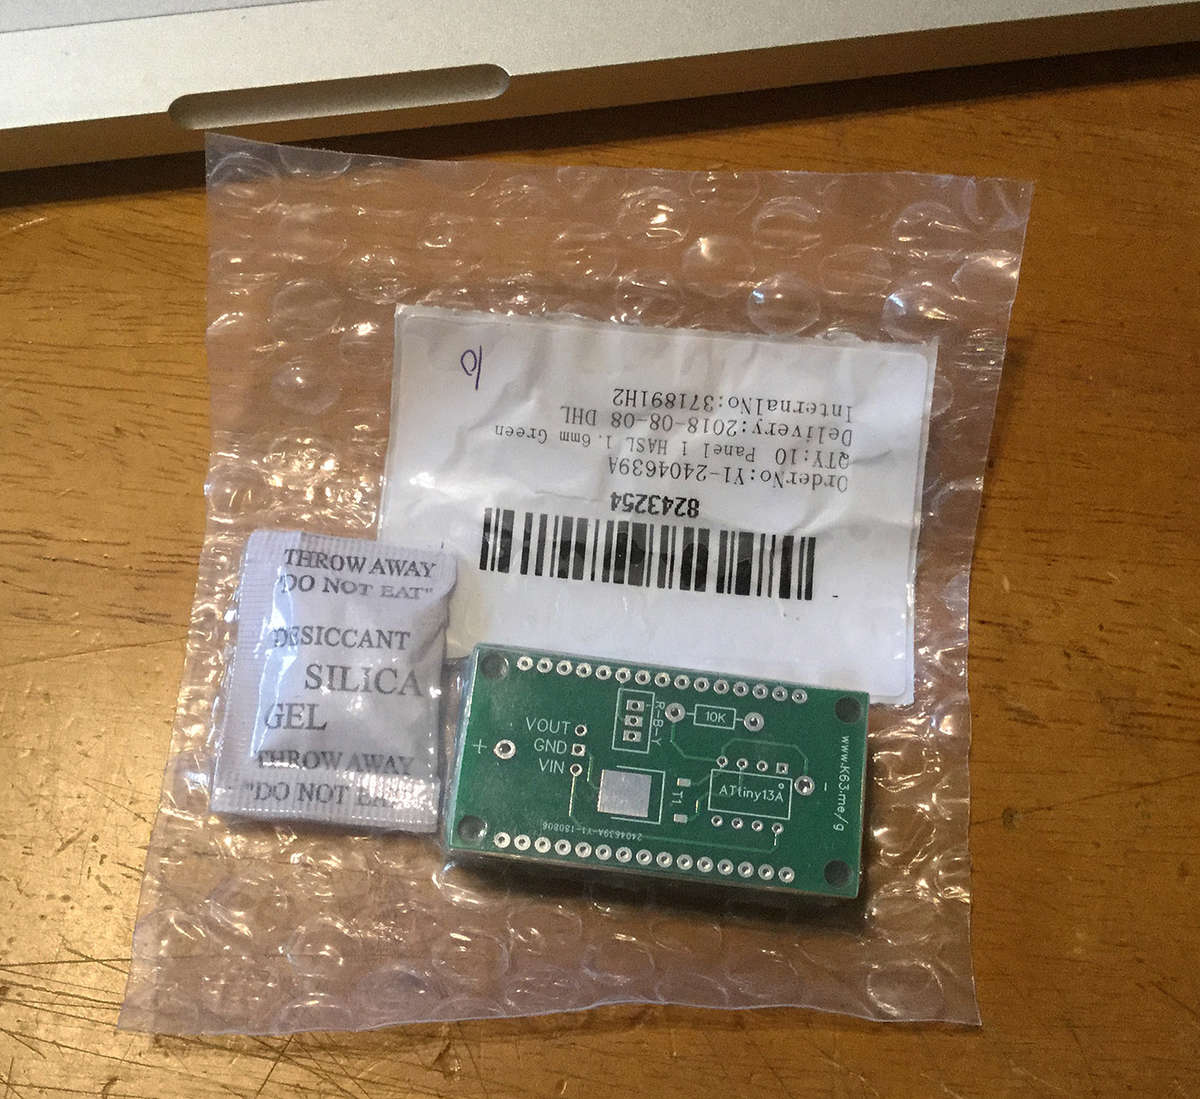 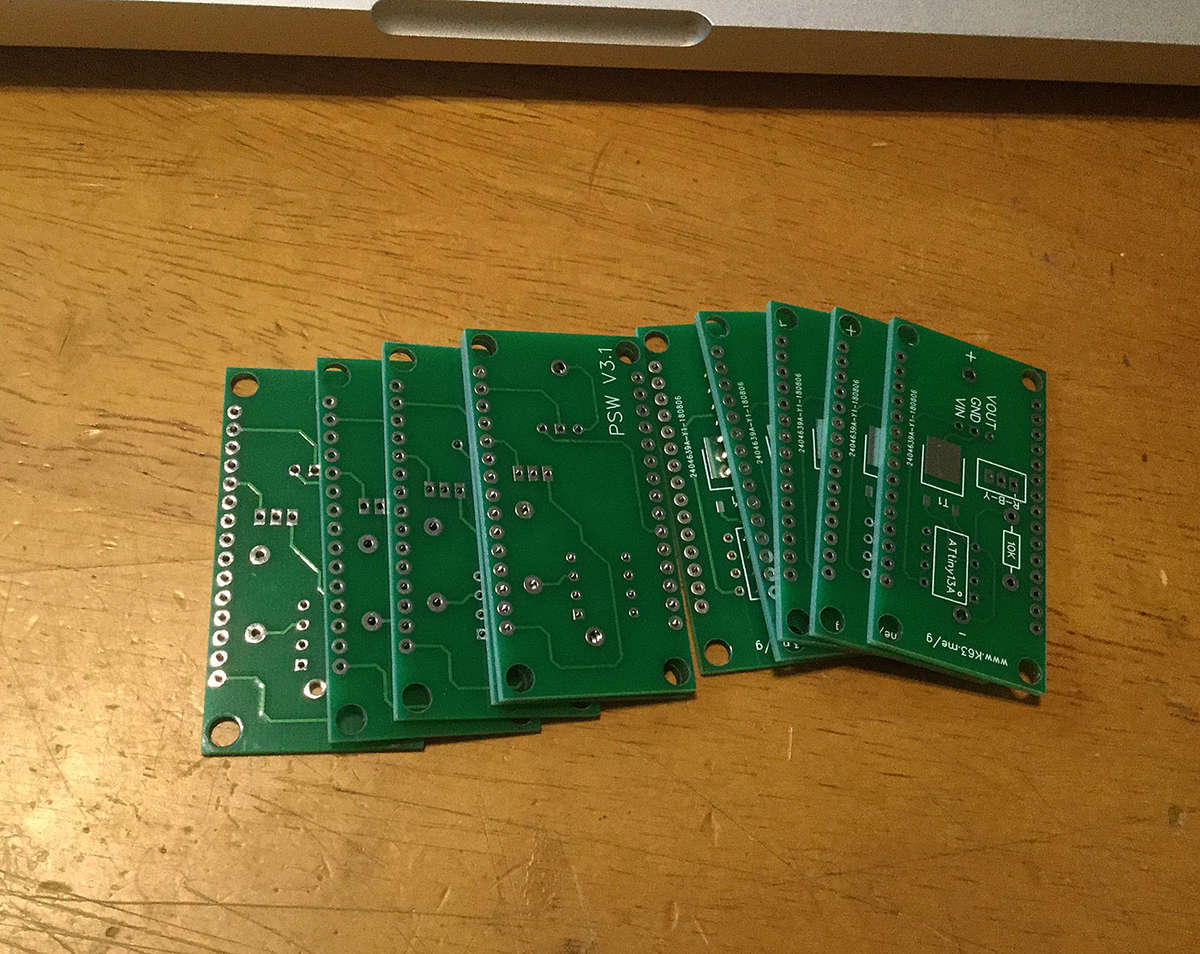  I did not expact it to be as fast with highly professional quality! Boards are spotless! |
PCB Assembly is a snapPosted: Friday, August 10, 2018 [20:00:03] - 7
Assembly is a snap as PCB is very precise and properly made. 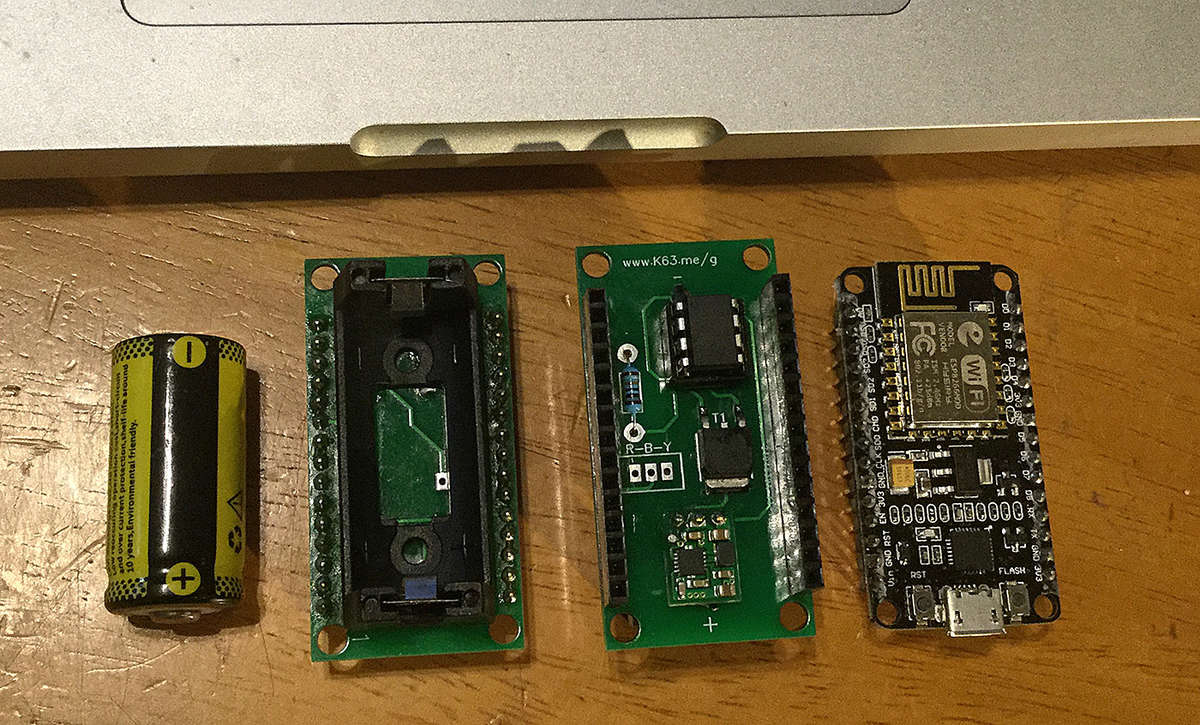  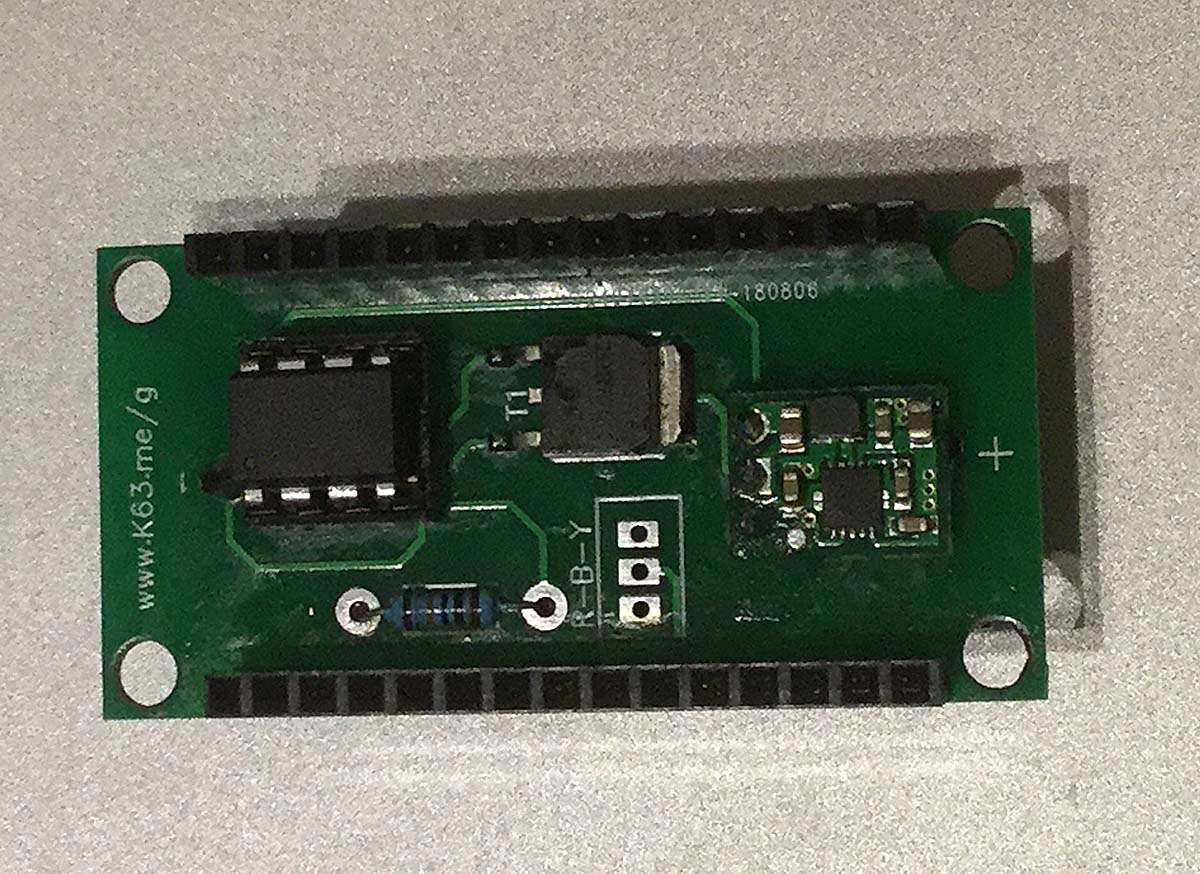 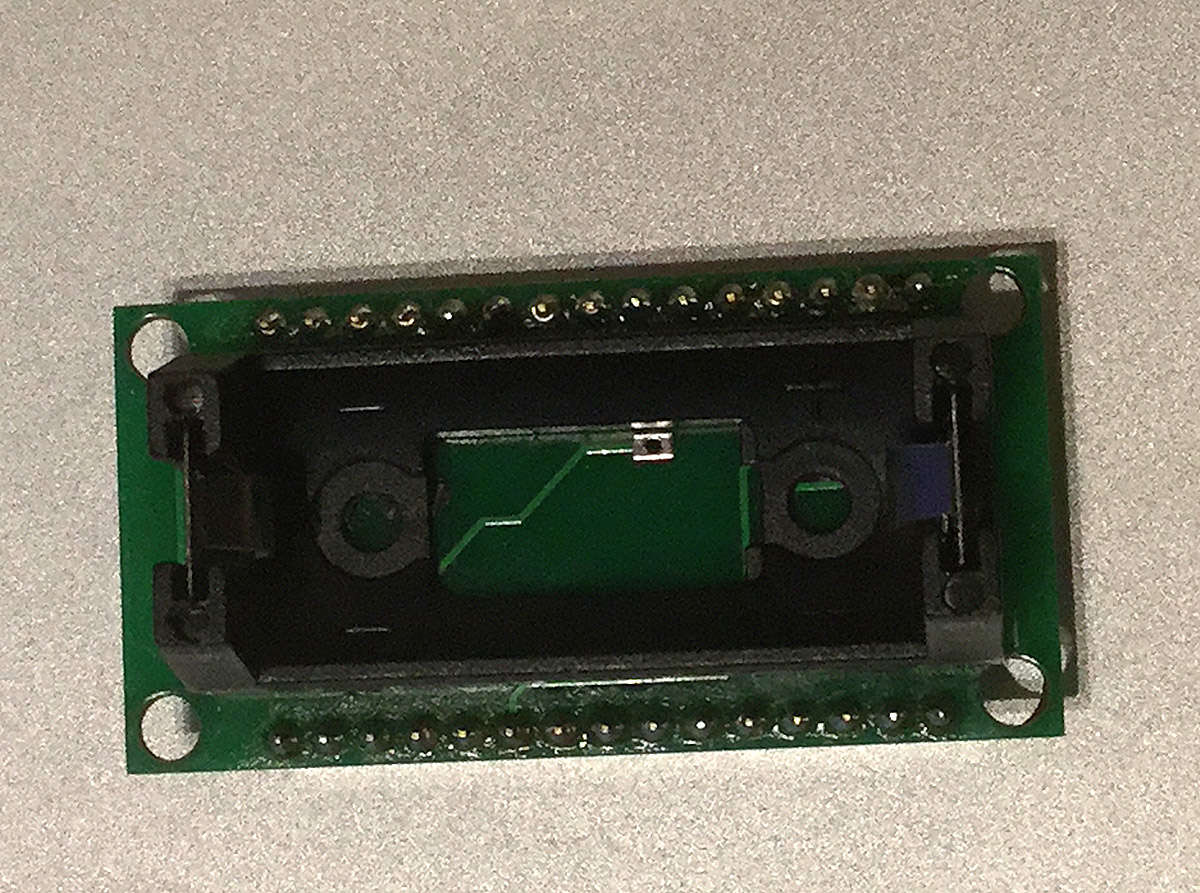 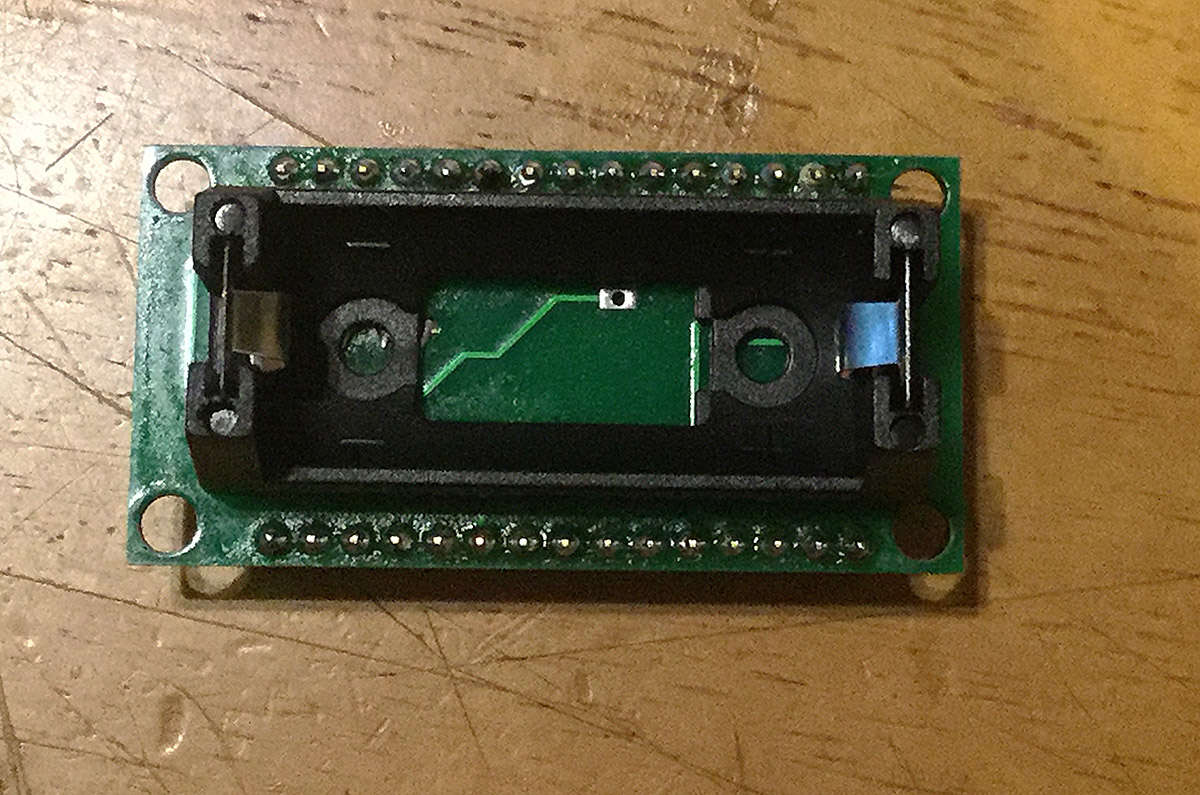 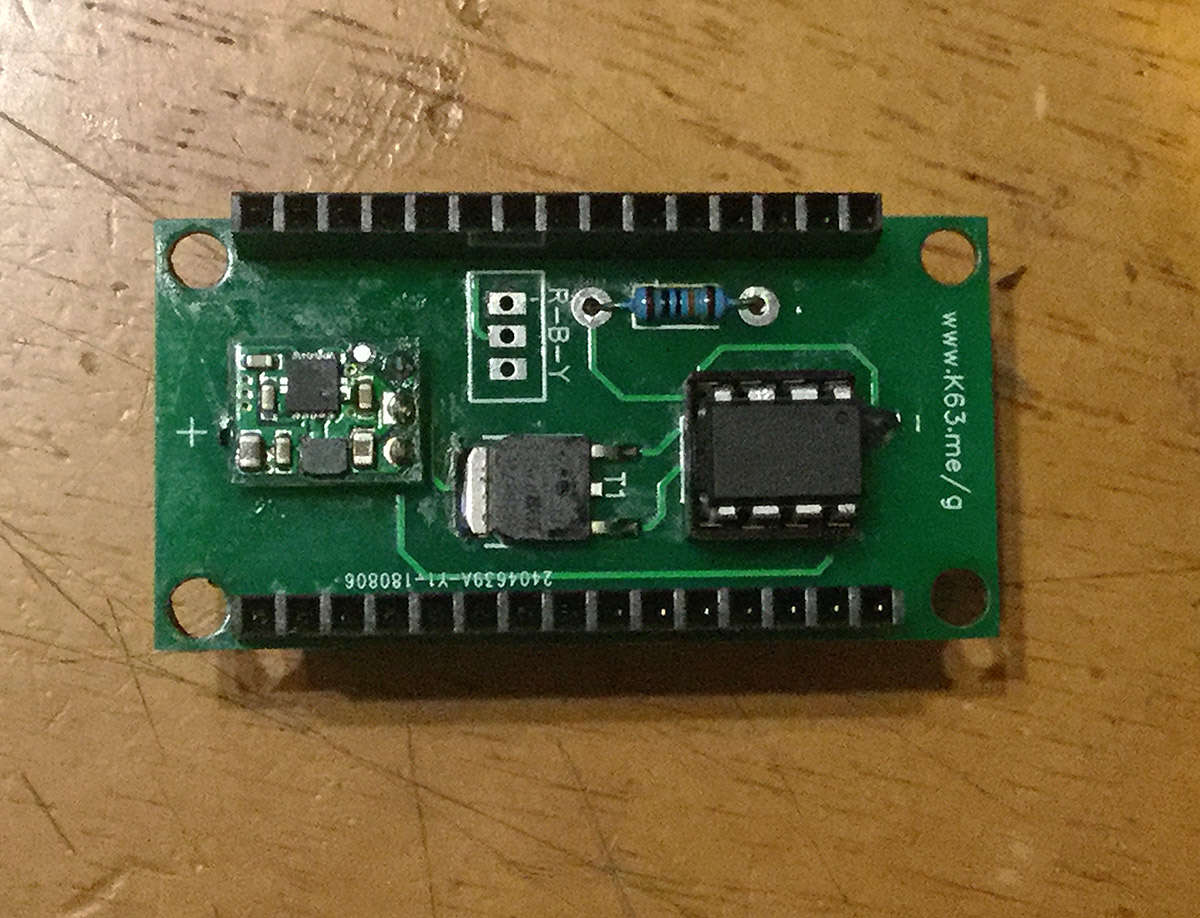 Assembly take roughly 10 minutes. Two boards complete and circuitry is verified. It works. The only thing left is to solder three wires to the sensor itself. |