Smart Garden project
Post ReplySmart Garden projectPosted: Thursday, April 5, 2018 [21:57:44] - 1
We have been growing tomatoes, cucumbers and a lot of flowers for the last few year and it became a real job watering, cutting and looking after our garden. This year I've decided to use some technological help. Plants watering system would include: - soil moisture sensors based on ESP8266 CP2102 Module - water tank - Raspberry Pi controlling water solenoids via JBtek 8 Channel DC 5V Relay Module and watching the water level in a water tank - database located on a Mac So far I am testing soil moisture sensors in a house:    It took me a while to get a Deep Sleep to work on ESP8266 CP2102 Module. Internet blogs in 8 out of 10 missed the part that we have to tie the RST pin to GPIO 16 on the ESP8266. On the NodeMCU, GPIO 16 is represented as D0.  Wiring ESP8266 CP2102 module with YL-69 soil moisture sensor: 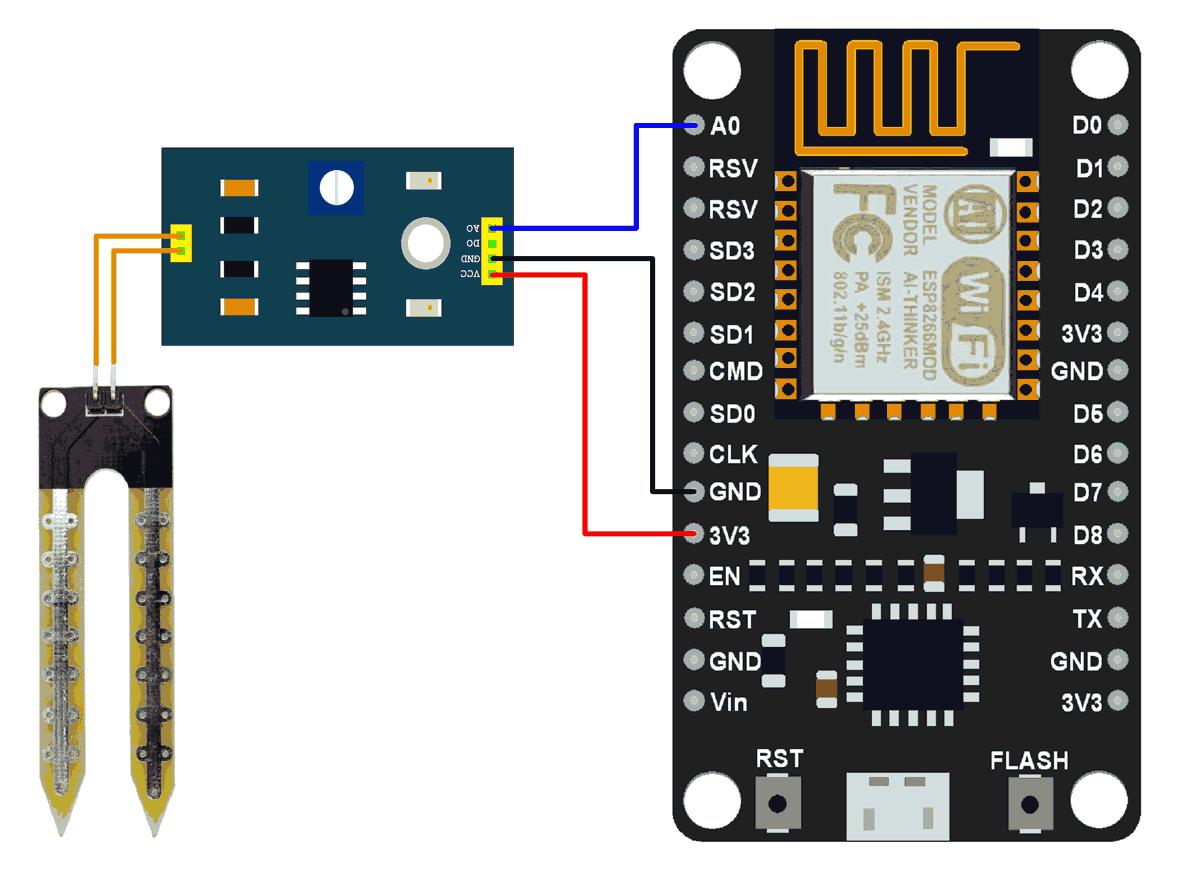 Here is a test sketch I am currently running for the module: An example showing how to put ESP8266 into Deep-sleep mode */ #include <ESP8266WiFi.h> // WiFi credentials. const char* WIFI_SSID = "SSID"; const char* WIFI_PASS = "SSID_Password"; #define soilPin A0 #define sensorPower 13 int ADCValue = 0; long sleepTimeSeconds = 45; String sensorId="001"; // Be sure to change this to your sensor ID WiFiClient client; int numFields = 1; char serverAddress[] = "192.168.X.X"; void connect() { // Connect to Wifi. Serial.println(); Serial.println(); Serial.print("Connecting to "); Serial.println(WIFI_SSID); WiFi.begin(WIFI_SSID, WIFI_PASS); // WiFi fix: https://github.com/esp8266/Arduino/issues/2186 WiFi.persistent(false); WiFi.mode(WIFI_OFF); WiFi.mode(WIFI_STA); WiFi.begin(WIFI_SSID, WIFI_PASS); unsigned long wifiConnectStart = millis(); while (WiFi.status() != WL_CONNECTED) { // Check to see if if (WiFi.status() == WL_CONNECT_FAILED) { Serial.println("Failed to connect to WiFi. Please verify credentials: "); delay(10000); } delay(500); Serial.println("..."); // Only try for 5 seconds. if (millis() - wifiConnectStart > 15000) { Serial.println("Failed to connect to WiFi"); return; } } Serial.println(""); Serial.println("WiFi connected"); Serial.println("IP address: "); Serial.println(WiFi.localIP()); Serial.println(); // while (!device.connected()) { // delay(1000); // Serial.print("."); // } } void HTTPPost(String fieldData[]){ // This function builds the data string for posting to Your Server and provides the correct format for the wifi //client to communicate with it. // It will post "numFields" worth of data entries, and take the data from the fieldData parameter passed to it. // Be sure to increase numFields to the number of fields you need, and activate the fields in your channel view. if (client.connect( serverAddress , 80 )){ // Build the Posting data string. If you have multiple fields, make sure the sting does not exceed 1440 characters. String PostData= "SoilSensor=" + sensorId ; for ( int field = 1; field < numFields+1; field++ ){ PostData += "&value=" + fieldData[ field ]; } // POST data via HTTP Serial.println( "Connecting to Server for update..." ); Serial.println(); client.println( "POST /u/soil.moisture.cgi HTTP/1.1" ); client.println( "Host: WhiteApple" ); client.println( "Connection: close" ); client.println( "Content-Type: application/x-www-form-urlencoded" ); client.println( "Content-Length: " + String( PostData.length() ) ); client.println(); client.println( PostData ); Serial.println( PostData ); client.stop(); } else { Serial.println( "Can not connect to the server.." ); } } int readSoil() { digitalWrite(sensorPower, HIGH); // Turn power to device on delay(10); // Wait 10 milliseconds for sensor to settle ADCValue = analogRead(soilPin); // Read the value from sensor digitalWrite(sensorPower, LOW); // Turn power to device off return ADCValue; // Return the moisture value } void setup() { Serial.begin(115200); Serial.setTimeout(2000); // Wait for serial to initialize. while (!Serial) { delay (100); } Serial.println("Device Started"); Serial.println("-------------------------------------"); Serial.println("Running Deep Sleep Firmware!"); Serial.println("-------------------------------------"); pinMode( sensorPower , OUTPUT ); digitalWrite( sensorPower , LOW ); // Set to LOW so no power is flowing through the sensor. } void loop() { connect(); delay( 2000 ); String data[ 8 ]; // You can fill data with up to 8 values to write to successive fields in your channel. digitalWrite(sensorPower, HIGH); // Turn power to device on delay(10); // Wait 10 milliseconds for sensor to settle data[ 1 ] = analogRead(soilPin); // Read the value from sensor digitalWrite(sensorPower, LOW); // Turn power to device off Serial.print( "Soil Moisture = " ); Serial.println( data[ 1 ] ); delay( 2000 ); HTTPPost( data ); delay( 2000 ); Serial.println("Going into deep sleep.."); ESP.deepSleep(20e6 * sleepTimeSeconds, WAKE_NO_RFCAL); Serial.println("Awakening now.."); delay( 2000 ); } So far so good. Two sensors report to the database every 15 minutes. Stay tuned for battery powering ESP8266 CP2102 module. |
 Posted by:
RE: Smart Garden projectPosted: Saturday, April 7, 2018 [02:29:29] - 2
Worked a little on a GUI to control and view the data. 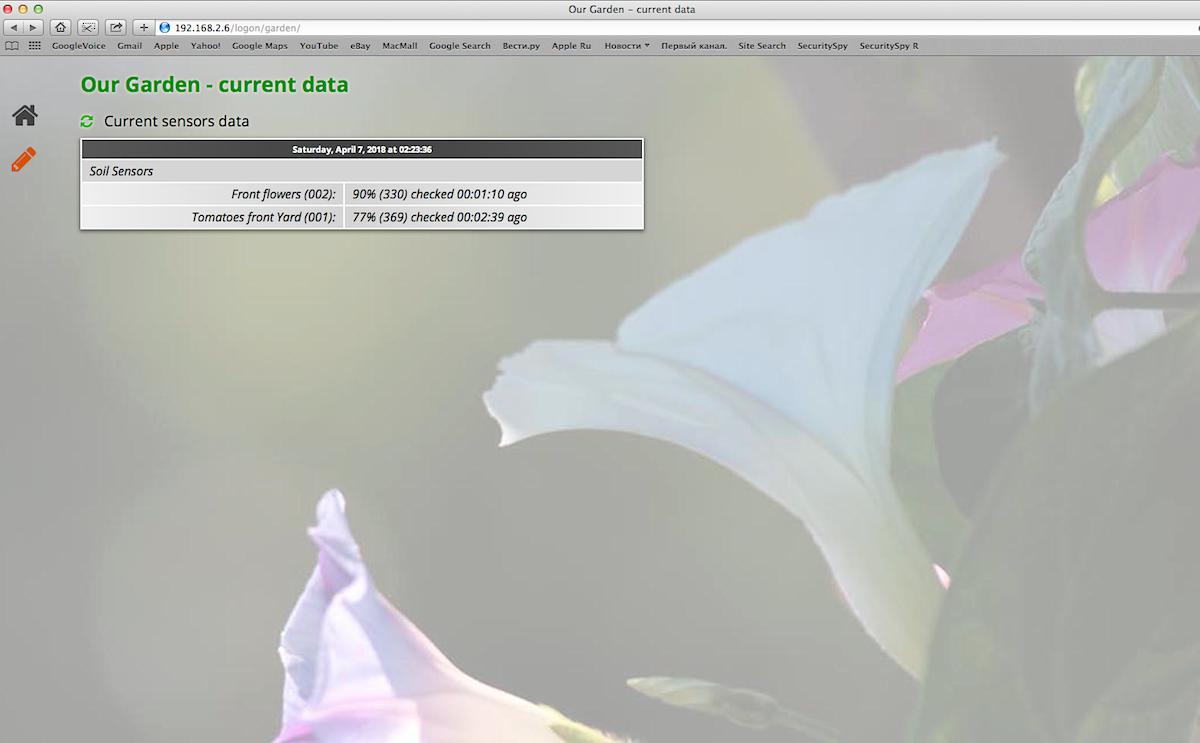  It is coming alone. As long as it is useful. |
Soil moisture sensors failed in 3 daysPosted: Friday, April 13, 2018 [22:39:00] - 3
Soil moisture sensors YL-69 failed one after another in 3 and 3.5 days.  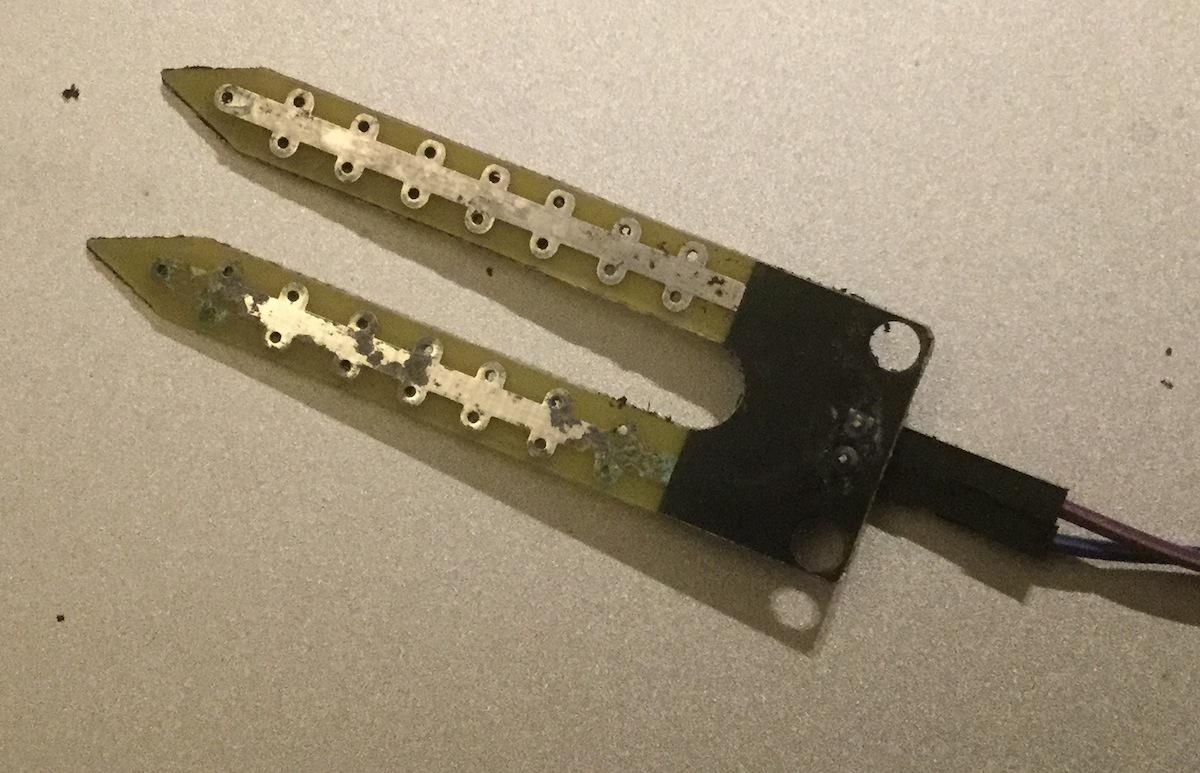 Time to move to something new. New sensor on the list is SEN0193 capacitive soil moisture sensor. |
Capacitive Soil Moisture Sensor SKU:SEN0193Posted: Friday, April 13, 2018 [22:47:15] - 4
New sensor arrived in a mail. More information available on: https://www.dfrobot.com/wiki/index.php/Capacitive_Soil_Moisture_Sensor_SKU:SEN0193 Connecting it to a ESP8266 CP2102 Module is straight-forward enough. Sensor: A - Module: A0 pin Sensor "+" - Module: 3V3 pin Sensor "-" - Module: GND  Run a calibration sketch to make sure readings are true. Then I just changed: Serial.begin(115200); to Serial.begin(9600); and sketch above just started working. It will require re-calibrating min and max values and it is ready to go. 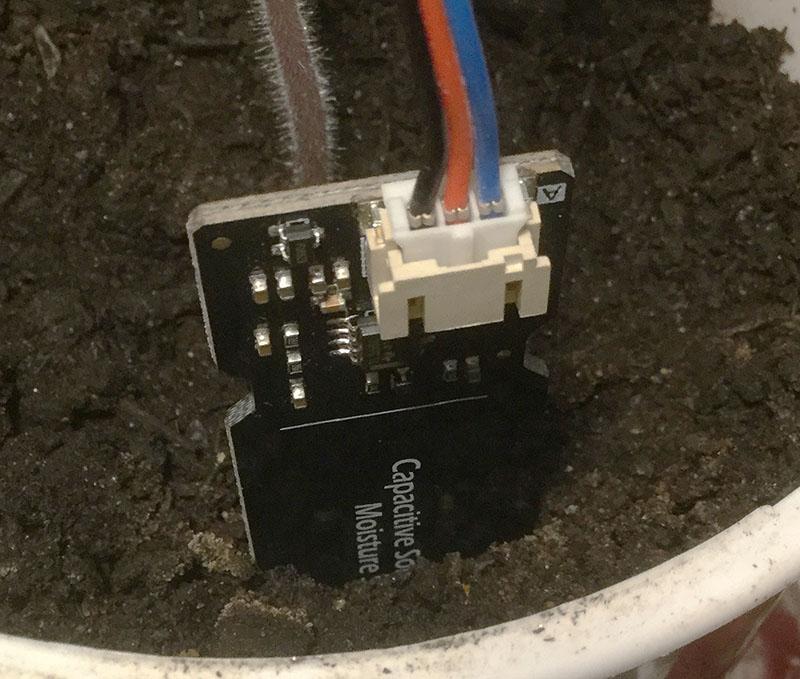 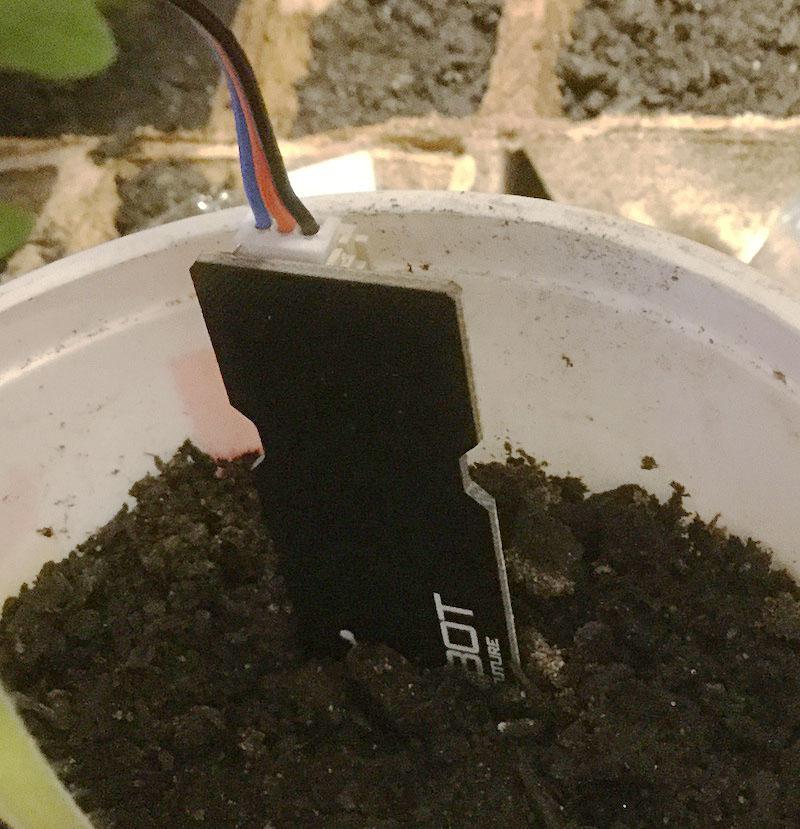 Hope to post some updates soon. |
Powering ESP8266 CP2102 module with LD1117V33Posted: Saturday, April 14, 2018 [16:43:10] - 5
Testing battery power option for ESP8266 CP2102 module: 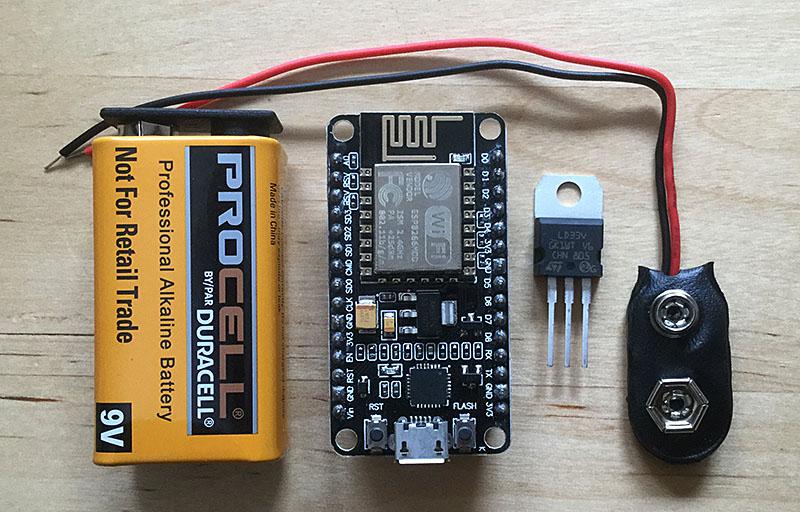 Schematics found on: henrysbench.capnfatz.com/.. 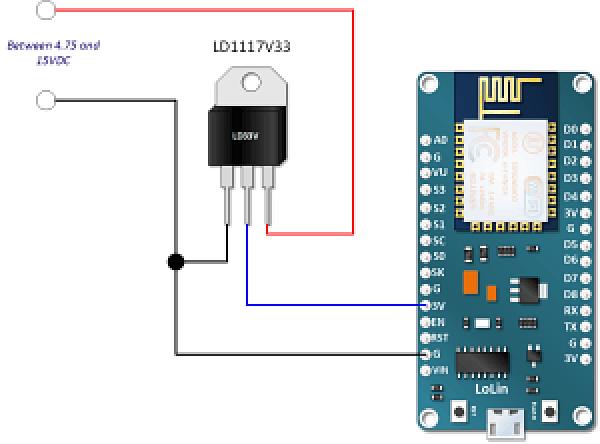 Stay tuned.. |
Soil moisture inserts designPosted: Friday, April 20, 2018 [00:04:47] - 6
Here is inserts 3D model for soil moisture sensors. It will insert into PVC 1 1/4" pipe. FIrst with 9v battery model in place:  and the one with battery removed: 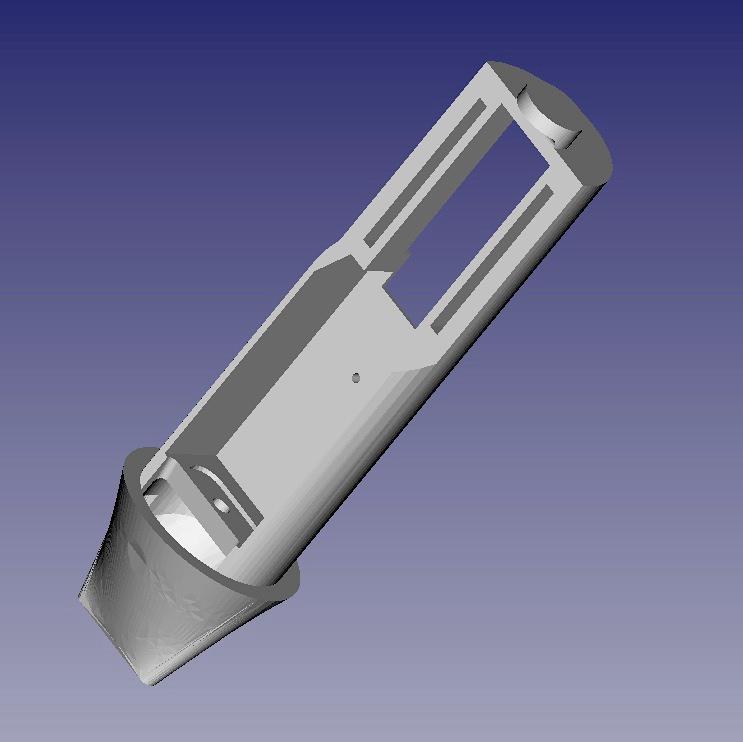 Capacitive sensor and WiFi module not installed. |
Prototype imagesPosted: Friday, April 20, 2018 [19:34:39] - 7
Did some prototyping for soil moisture sensor. Printed parts to verify fit of the parts. 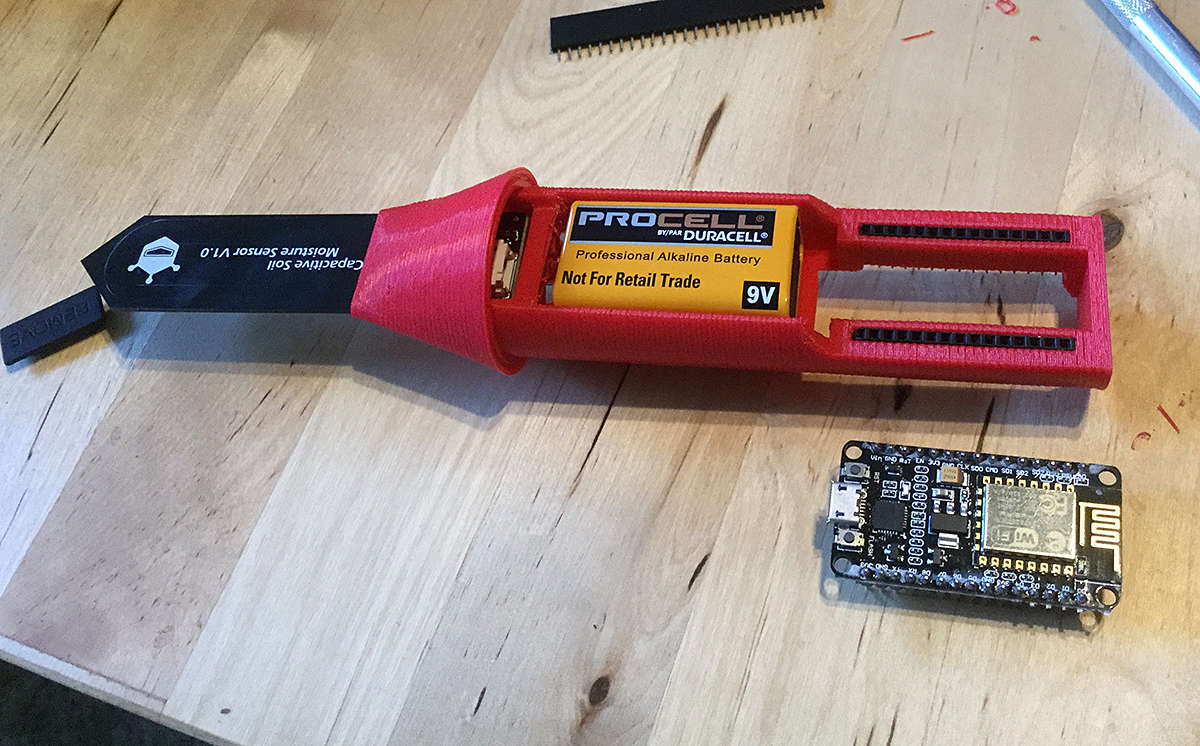 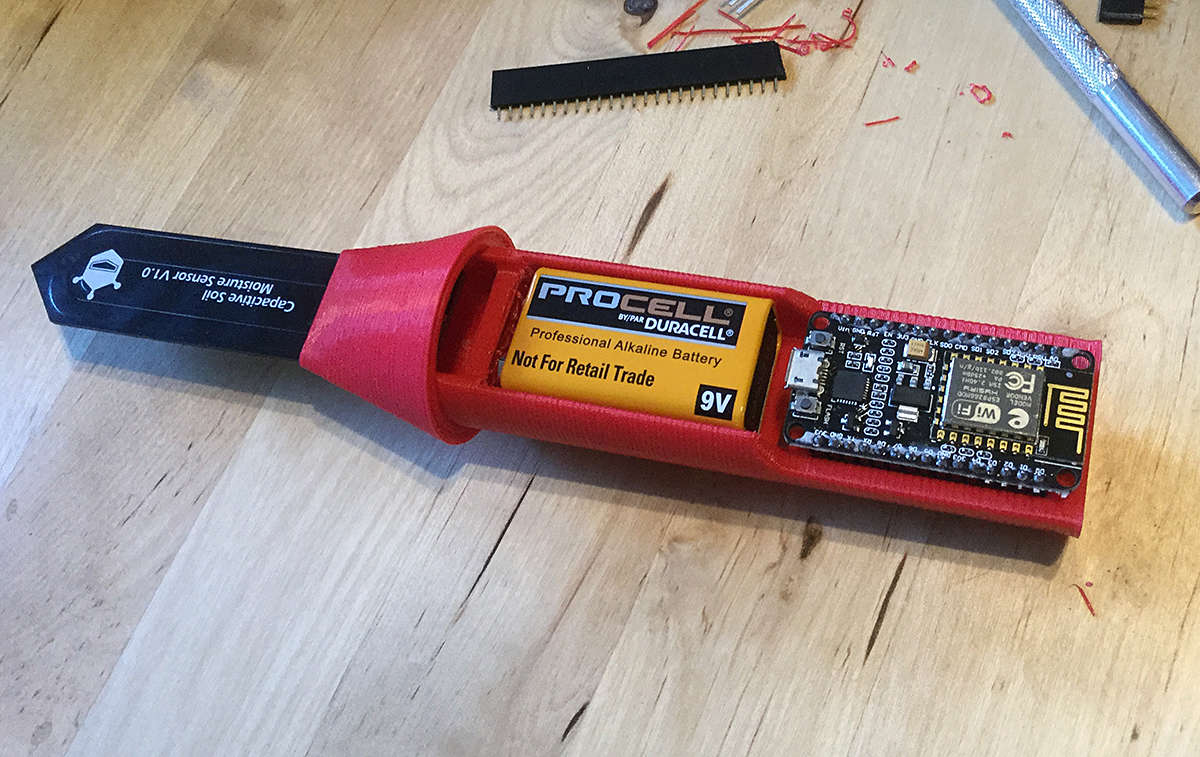   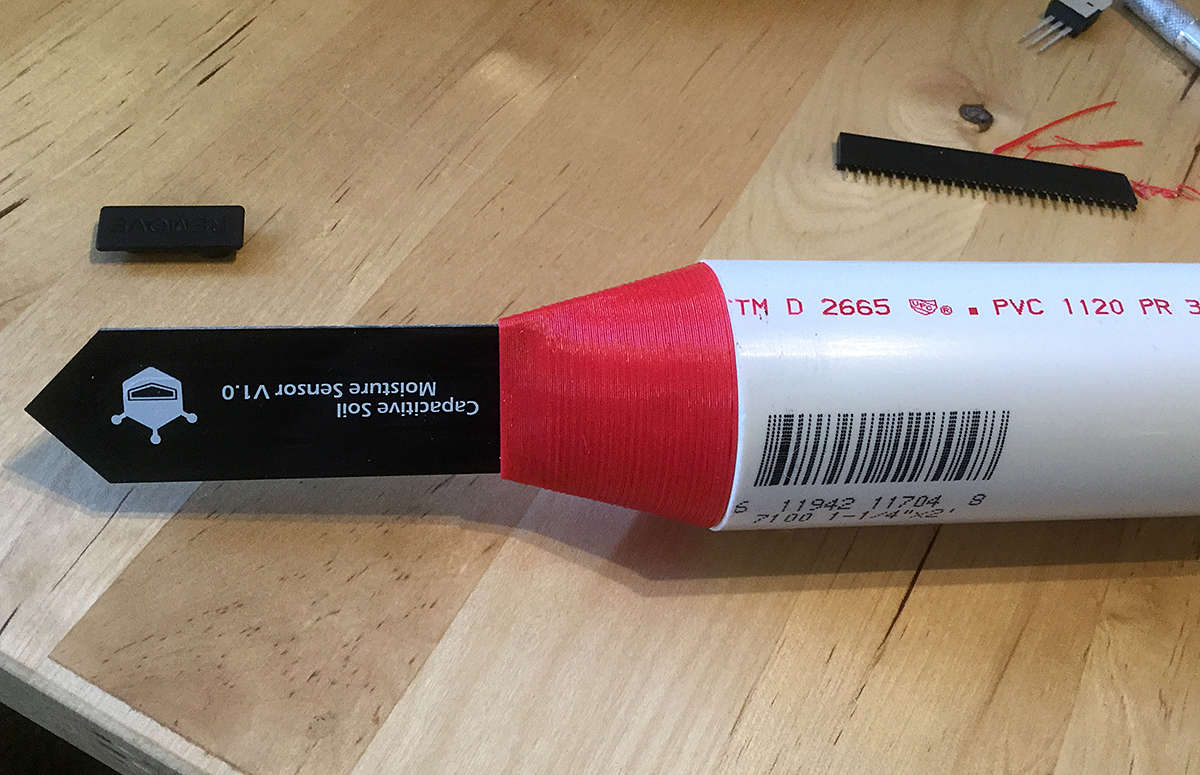 Looks good |
Soil Moisture sensor V1.2Posted: Friday, April 27, 2018 [20:47:41] - 8
Just got my package from AliExpress with Soil Moisture sensors V1.2. Six sensors ordered April 12, 2018 from China and delivered on April 27, 2018 for US $20.53 S/H included. One sensor V1.0 on eBay cost me US $14.74 delivered. One V1.2 sensor already hooked-up on a testbed - works just as V1.0 using the same Arduino sketch and wiring is the same. Here is some comparison pictures:  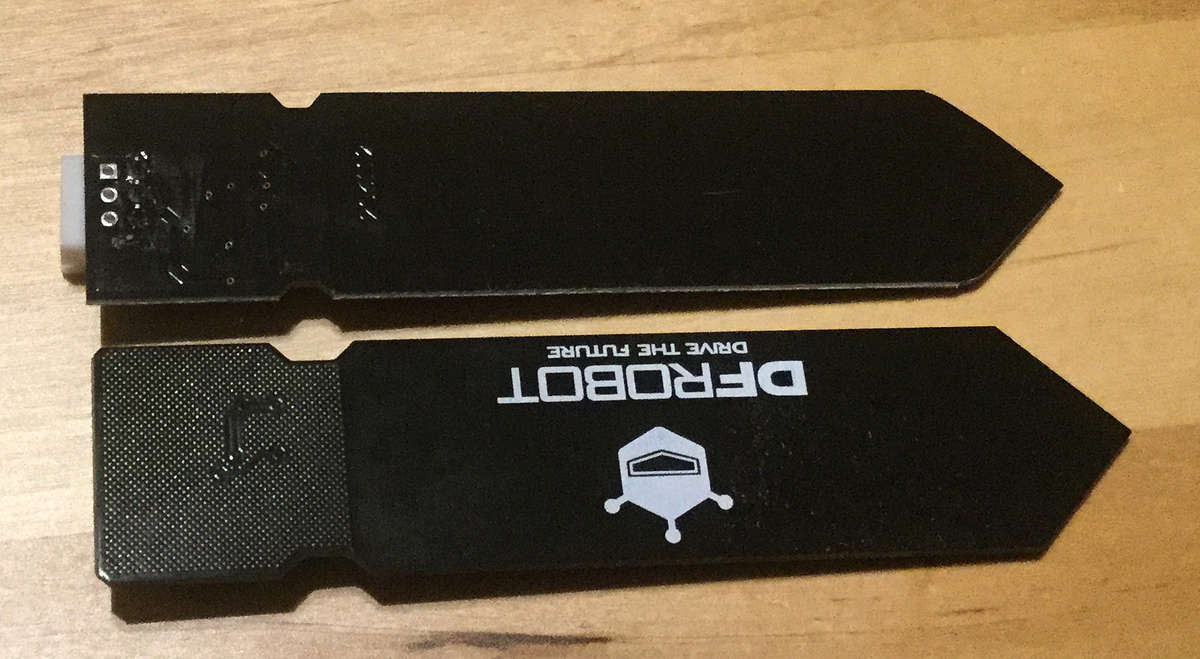 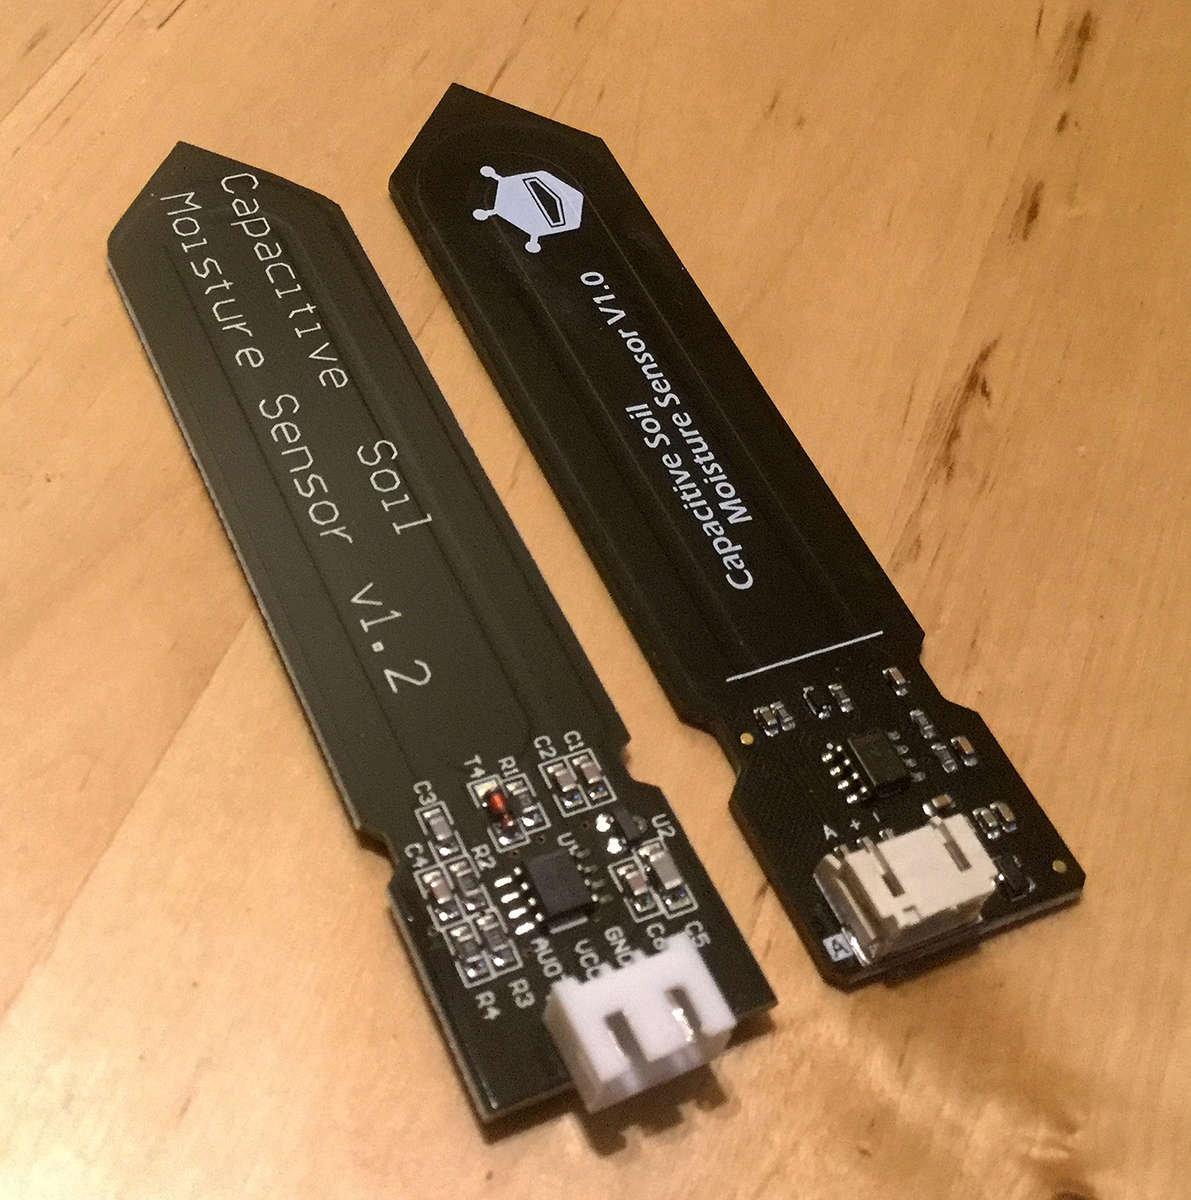 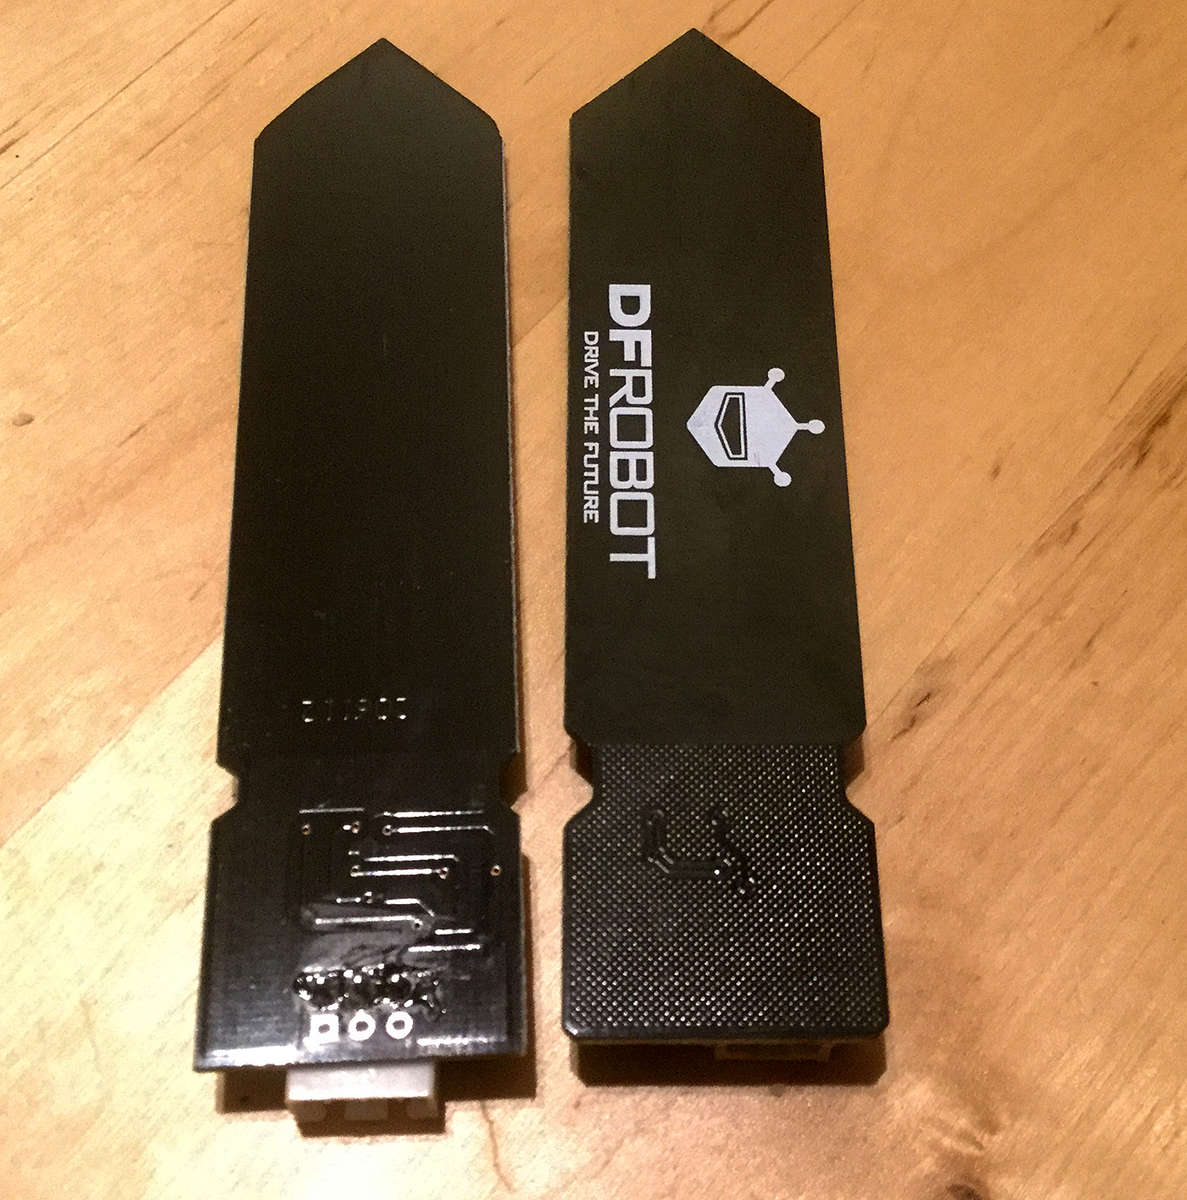 and here is a microscope pictures of the chip used on V1.0 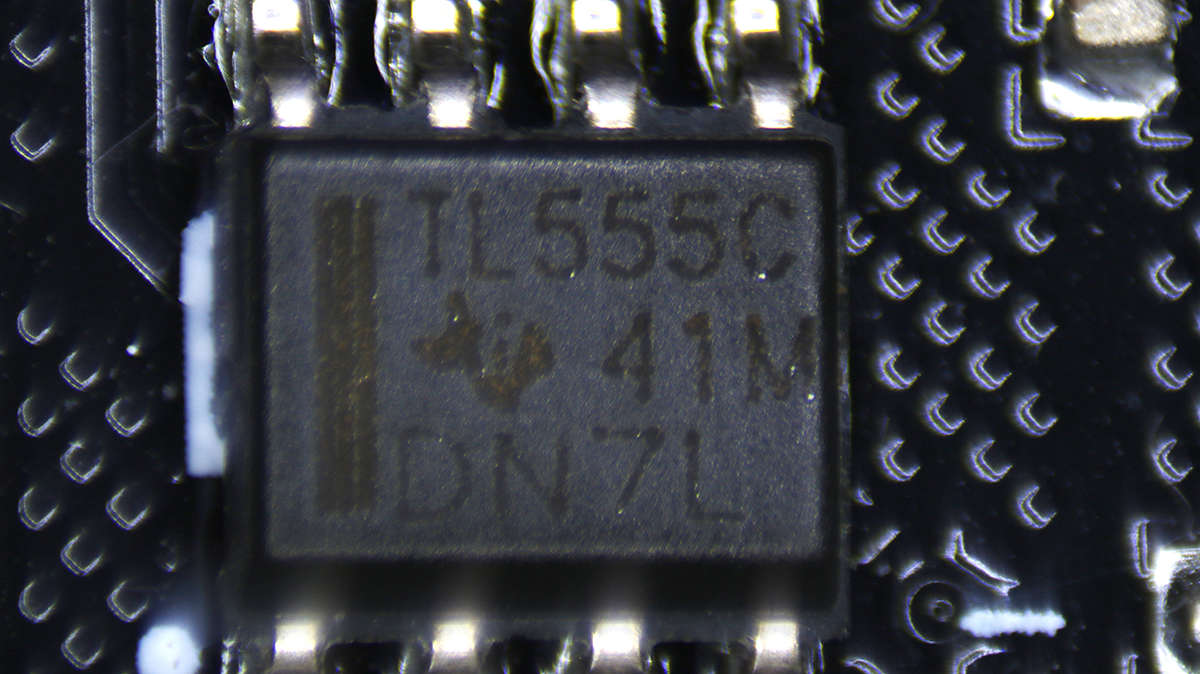 and V1.2 chip: 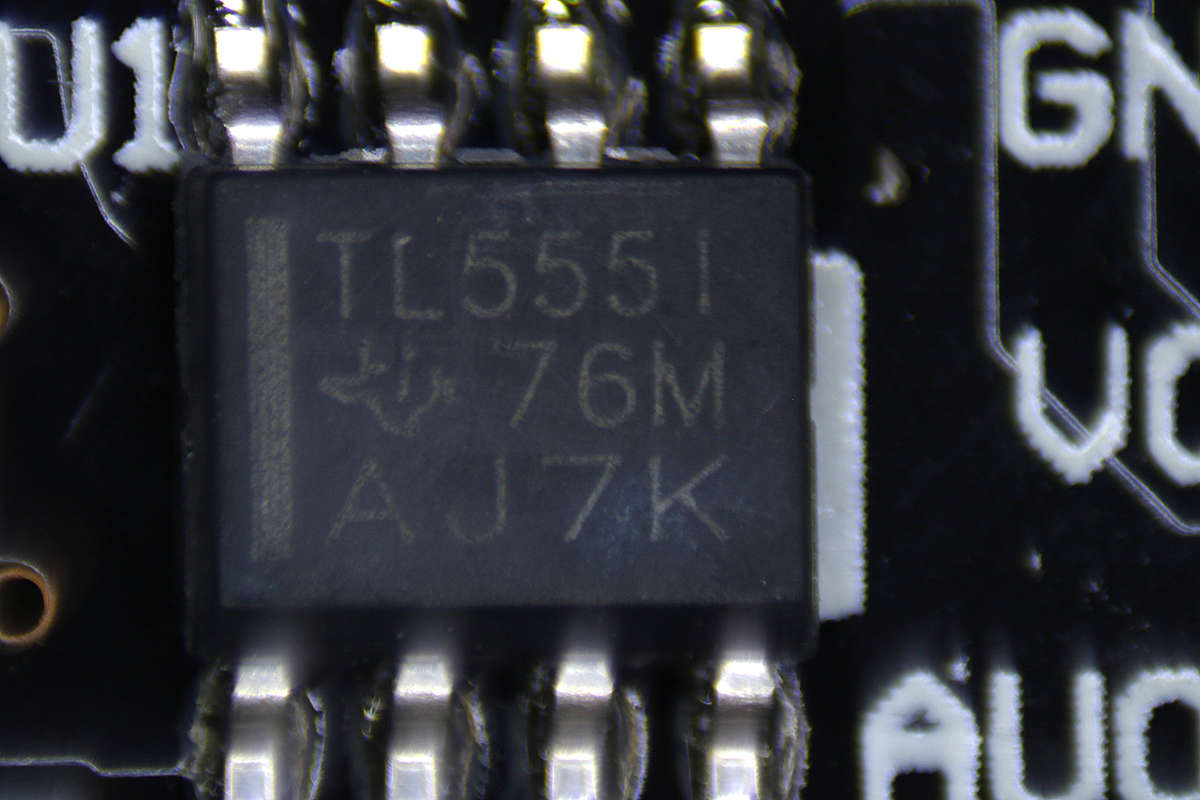 if it makes sense for someone who is more familiar with electronics.. also, it caught my attention - here is an image of some sort of capacitor (my guess) used on V1.2 sensor. It has a glass body with liquid in it. 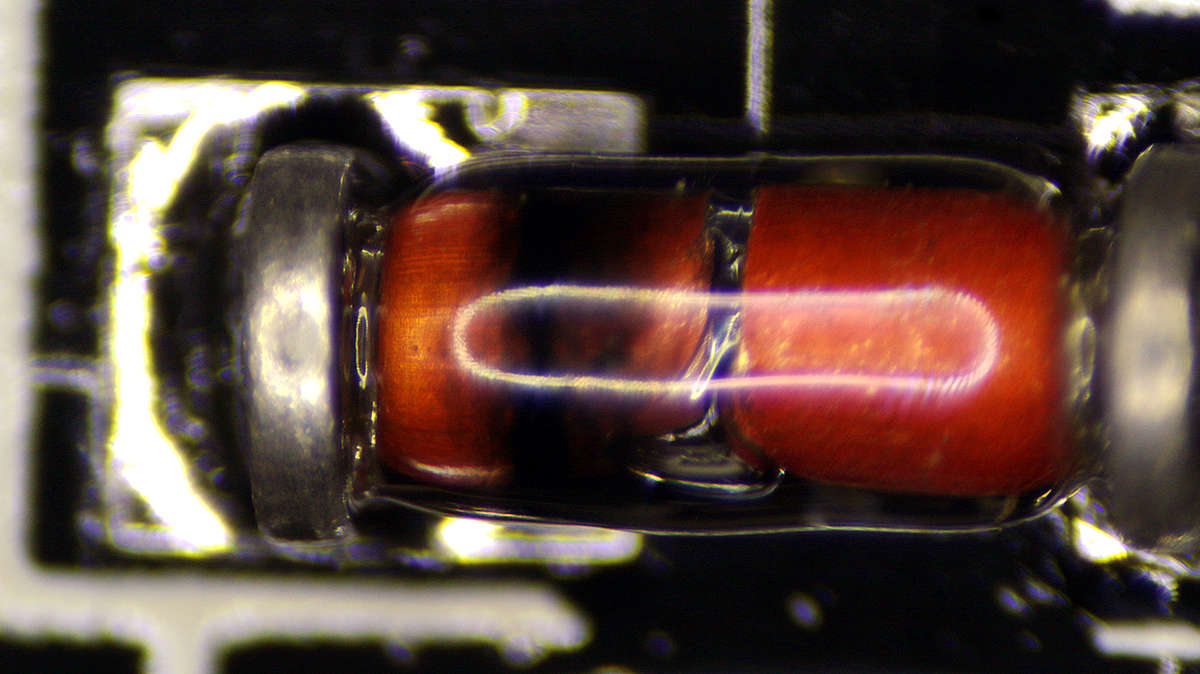 you can see it on sensor pictures above but it is too small to see. |
First soil moisture sensor tested outsidePosted: Wednesday, May 2, 2018 [16:33:24] - 9
First soil moisture sensor tested outside on battery power. It is about 50 feet away from WiFi AP. Sends readouts every 15 minutes without a hitch. 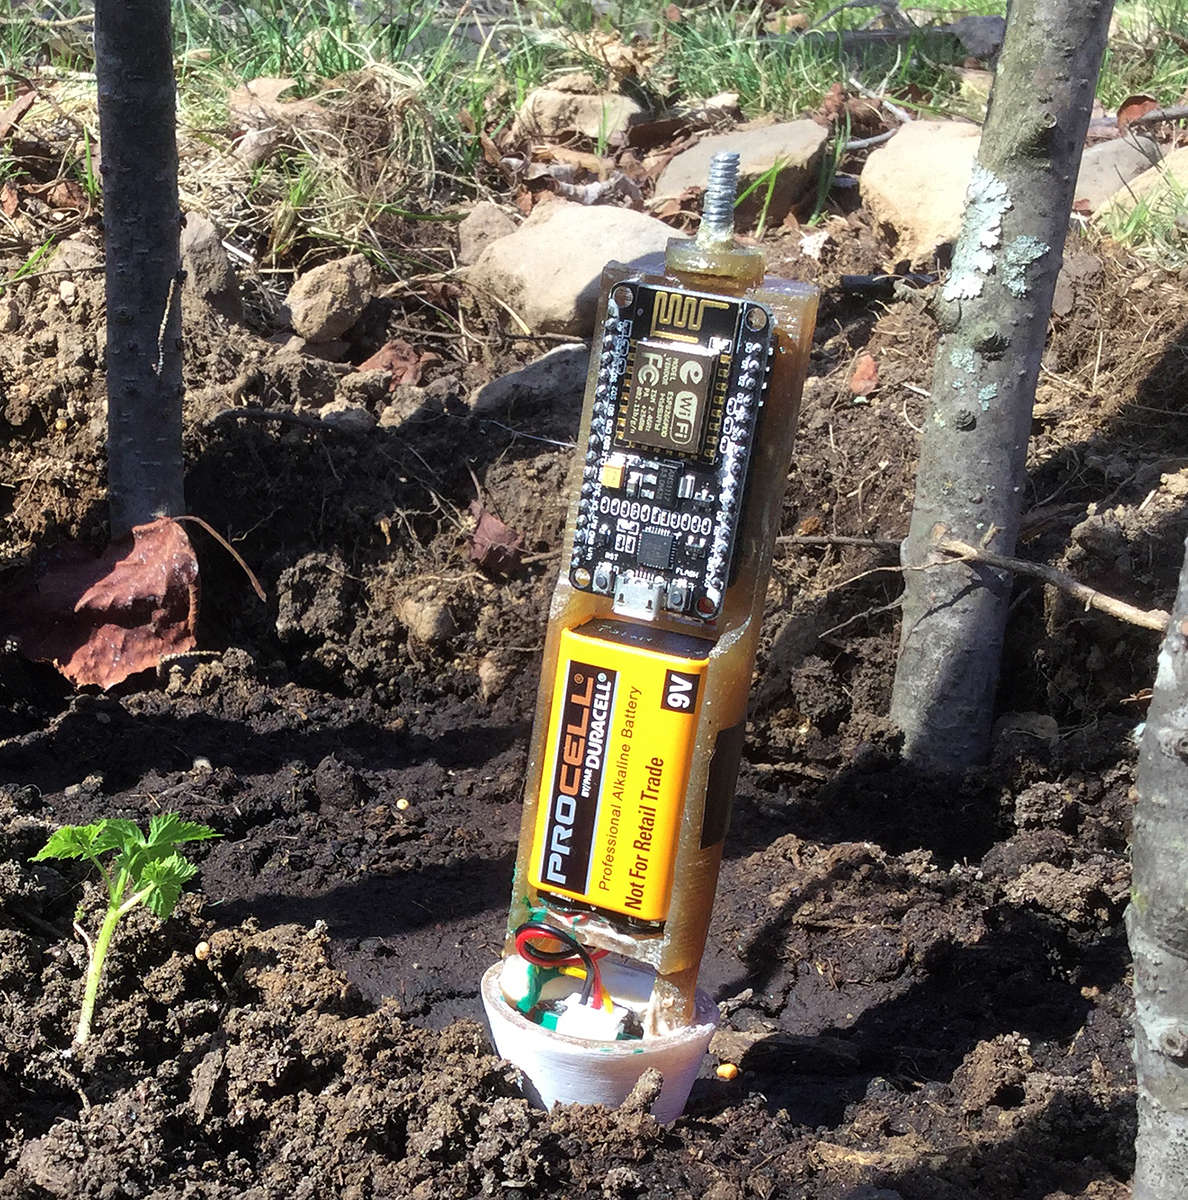  This is a close-up after removing it for liquid tape contacts treatment: Parts made out of fiberglass resin reinforced with fiberglass in a silicone mold. |
Making some more soil moisture sensorsPosted: Tuesday, May 15, 2018 [14:34:50] - 10
Just came out of the mold: 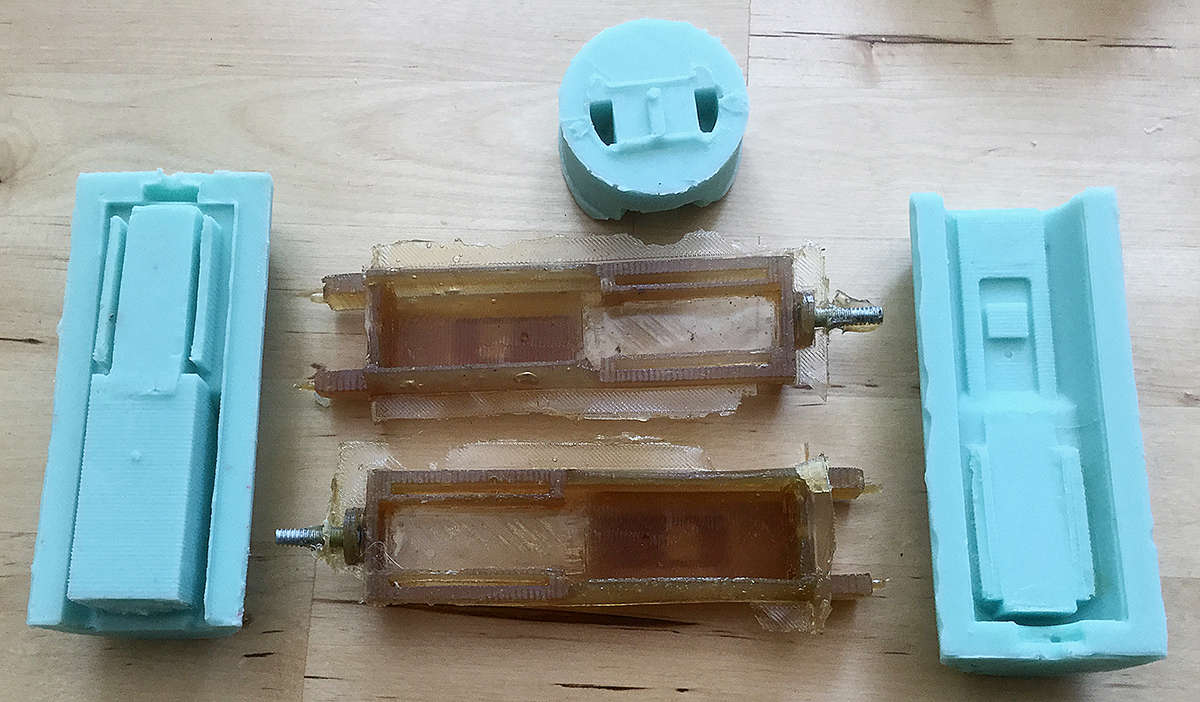 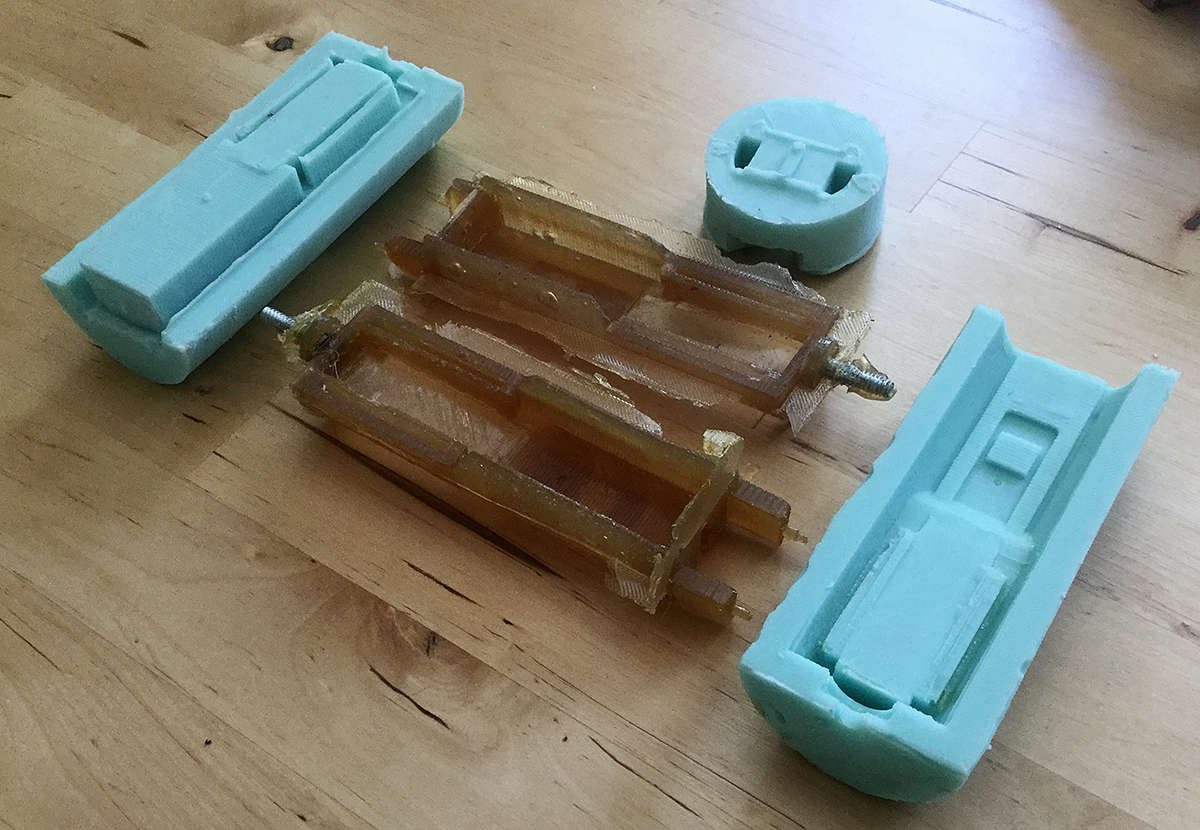 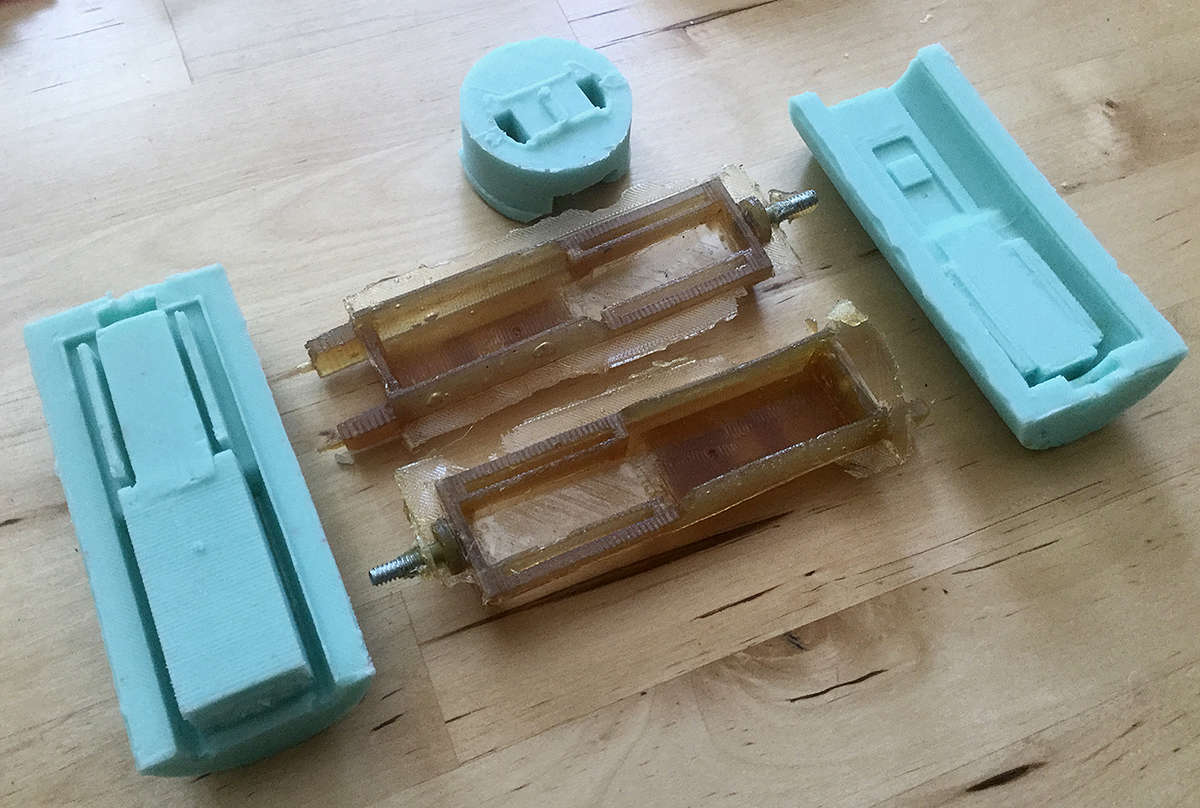  Needs some cleaning and then do some assembly |
Project partsPosted: Sunday, May 27, 2018 [00:49:34] - 11
Parts of the project: Connecting a JBtek 8 Channel DC 5V Relay Module www.codemacs.com/raspberr.. Building a water tower: www.codemacs.com/raspberr.. Soil moisture sensor V3.0: www.codemacs.com/raspberr.. |
Smart Garden project partsPosted: Wednesday, June 12, 2019 [02:09:41] - 12