2011 MacBook Pro Video GPU issues successful repair with images.
Post Reply2011 MacBook Pro Video GPU issues successful repair with images.Posted: Tuesday, February 6, 2018 [21:52:24] - 1
In short: "I've got my Mac back"! After reading many repair "how-tos" and trying to fix EFI settings - nothing worked. Finally I came across an article on how to properly change EFI settings with proper steps to follow. WARNING! Missing a single step in EFI resetting procedure will render all the work useless! Original article can be found at Real Mac Mods Website: https://realmacmods.com/macbook-2011-radeon-gpu-disable/ Step by step procedure: 1. Download ArchLinux ISO https://www.archlinux.org/ 2. Create bootable USB with downloaded .iso - Identify the USB device. - Open Terminal in Mac OS X and list all storage devices: Your USB device will appear as something like /dev/disk2 (external, physical). Verify that this is the device you want to erase by checking its name and size and then use its identifier for the commands below instead of /dev/diskX (X is the number you get from the list from diskutil). A USB device is normally auto-mounted in Mac OS X, and you have to unmount (not eject) it before block-writing to it with Now copy the ISO image file to the device. The dd command is similar to its Linux counterpart, but notice the ‘r’ before ‘disk’ for raw mode which makes the transfer much faster: After completion, Mac OS X may complain that “The disk you inserted was not readable by this computer”. Select 'Ignore'. The USB device will be bootable. 3. Use Linux bootable USB drive to boot into EFI. - Insert USB drive to your MacBook Pro and hold "Option" key while booting. - Choose "EFI Boot" when you will see available boot options. WARNING! Press "e" (key on your keyboard) ONCE when menu appears on your screen! That will bring editable GRAB options for ArchLinux. AT THE END of the long string with options add: and then press "Enter". MAKE SURE there is a space between original string and the "nomodeset"! If all goes well you will get a Linux console. It may take a while to get there, so be patient. 4. Clear EFI variables. - Change Directory to: Explore directory: to see if there is a gpu-power-prefs-.. - If there is such a variable, its better to remove it with rm. (use Tab to complete the filename) - If you are getting the “operation not permitted” message while attempting to rm, it means that efivarfs has been mounted as read-only and you need to remount it with read-write permissions and try again: umount /sys/firmware/efi/efivars/ mount -t efivarfs rw /sys/firmware/efi/efivars/ cd /sys/firmware/efi/efivars/ rm gpu-power-prefs- - If this also fails (you still can’t erase the file), use chattr command to disable file immutability and then erase the file: rm gpu-power-prefs- ONLY IF YOU HAVE DELETED FILE CONTINUE TO THE NEXT STEP! 5. Create new gpu-power-prefs-… file add immutability to the gpu-power-prefs-… file This chattr command is supposed to lock a file to make it accessible only by “superuser” – and so that, while booting, your EFI will have no chance to screw up your gpu-power-prefs-… variable under any circumstances 6. Change to the root directory to unmount efivars umount /sys/firmware/efi/efivars/ That guarantees that your EFI variables are flushed to efivarfs filesystem. Please unmount it safely before rebooting. 7. Reboot WARNING AND VERY IMPORTANT! Reboot into a Safe Mode by entering "reboot" in terminal window and HOLD SHIFT KEY THROUGHOUT boot! AFTER SUCCESSFUL BOOT choose "SHUTDOWN" - DO NOT REBOOT! Without this SAFE BOOT, the next steps may not work! DO NOT BOOT YOUR MAC UNTIL NEXT STEPS COMPLETED! The safe boot clears OS level GPU preferences, that may interfere with the following process. This will now cause your MacBook Pro to stop switching to the Radeon video automatically. NEXT: Removing one resistor will effectively disconnect power to the faulty GPU! |
 Posted by:
RE: 2011 MacBook Pro Video GPU issues successful repair with images.Posted: Tuesday, February 6, 2018 [22:22:33] - 2
Removing resistor from the logic board.  on this picture resistor is compared to the US Dime (ten cents US coin 18mm in diameter) By simple de-soldering a small resistor from the logic board we cut-off the power to the Radeon GPU. I personally used a thin soldering iron and a 40X Microscope. Here I am including a pictures I took working on Late 2011 15" MacBook Pro. I hope pictures will help locating tiny resistor on a logic board. 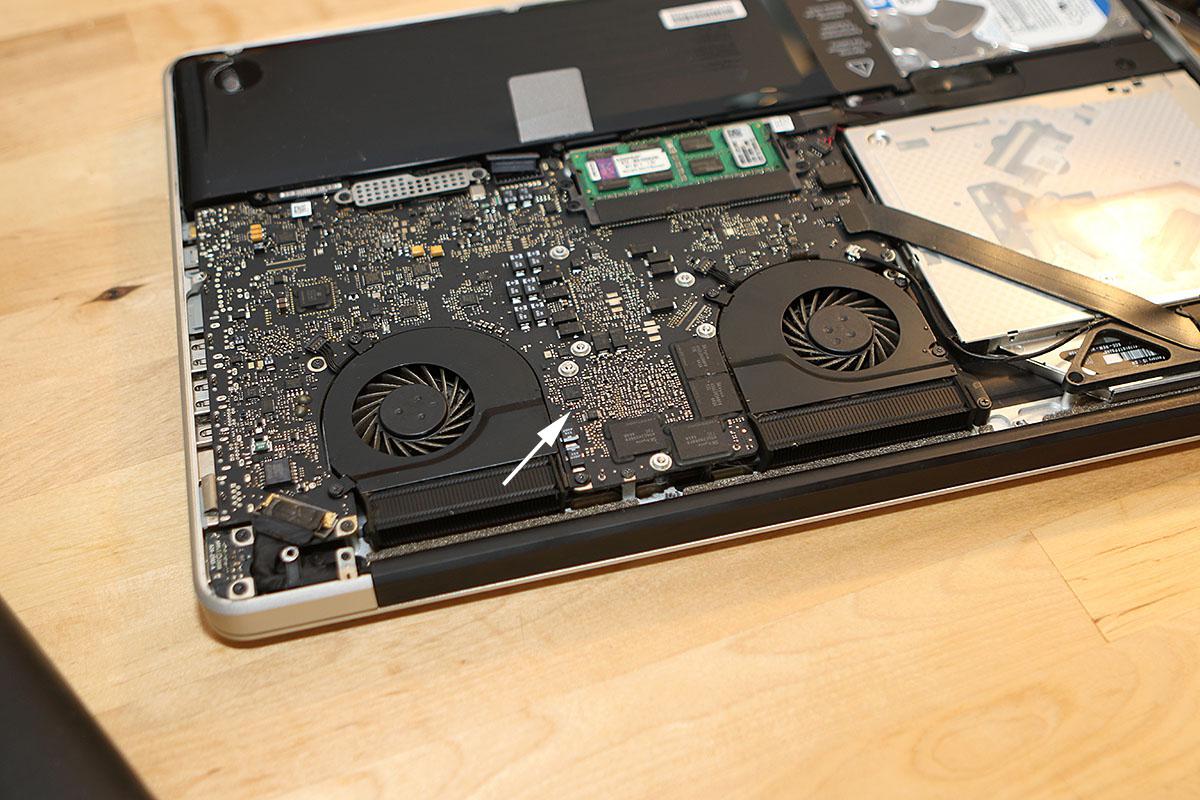   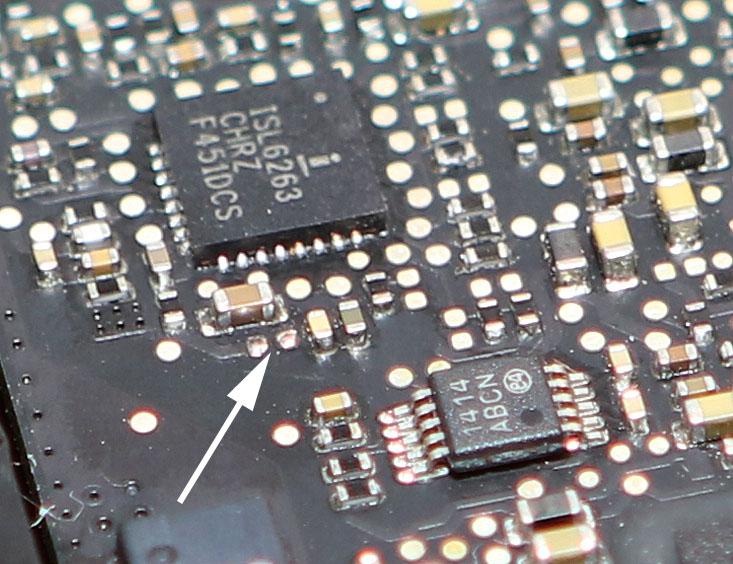  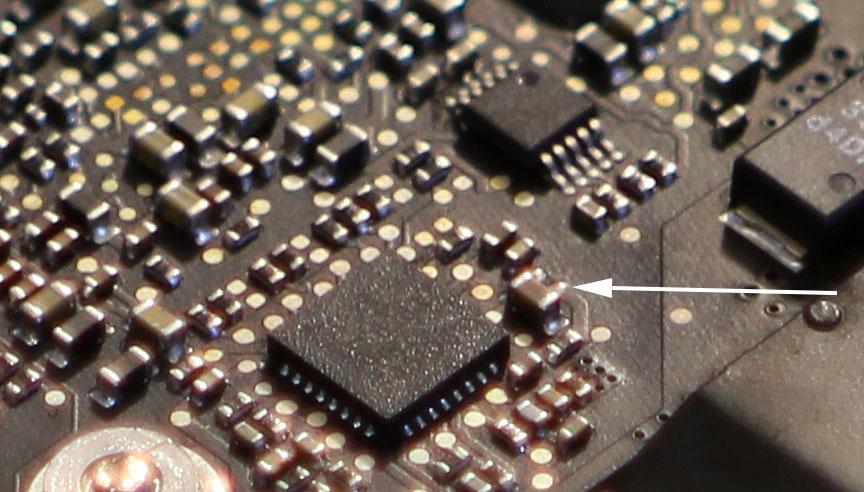 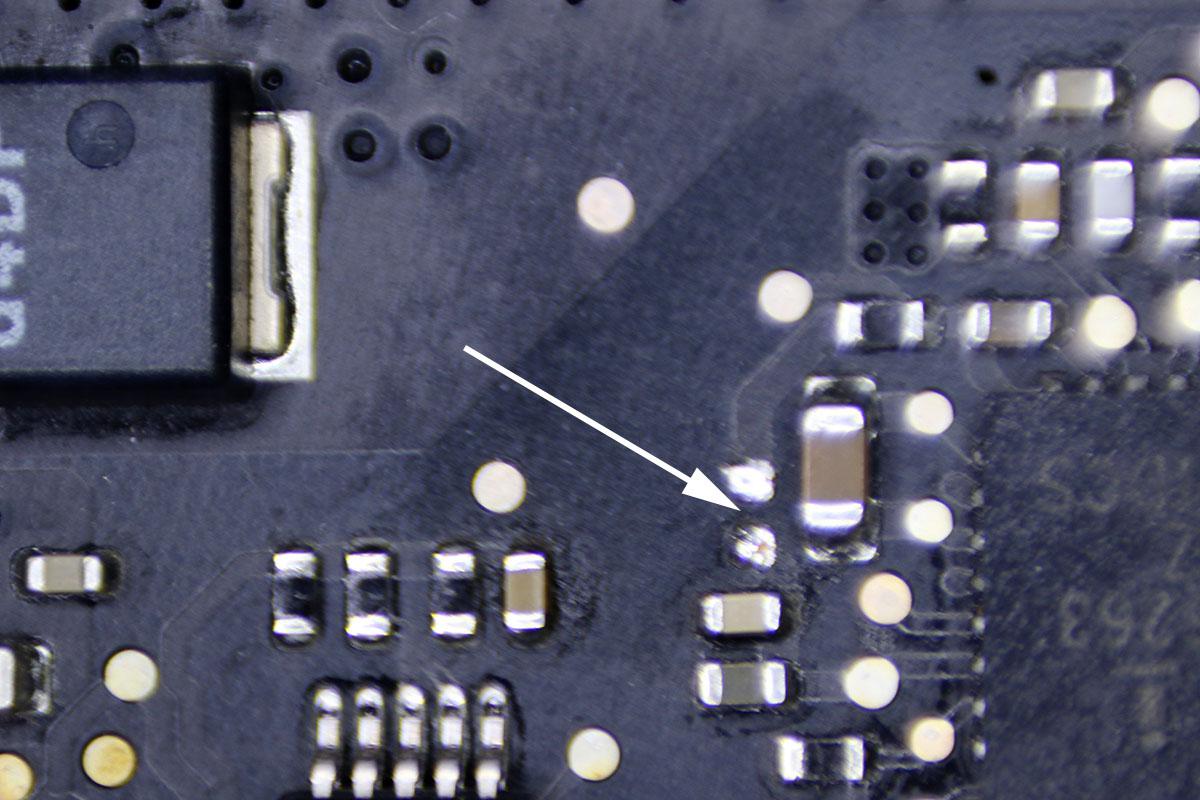 Resistor is already removed from the board on pictures above. After putting MacBook Pro back together it took a little longer than normal to boot. Checking System Information -> Graphics/Displays shows no mentioning of AMD GPU. 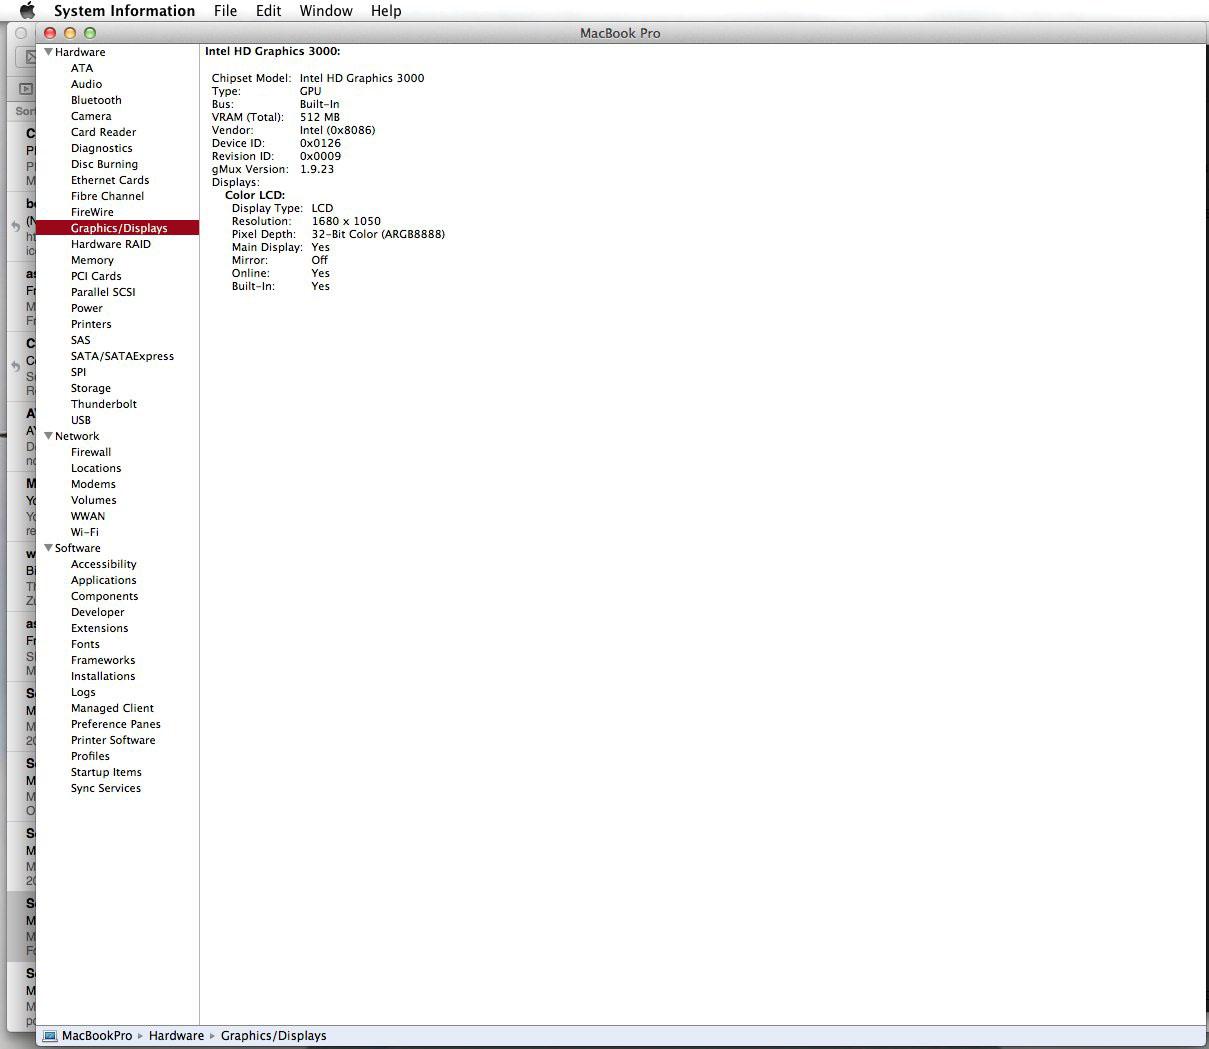 My beloved 15" 7 years work horse is back with gorgeous Mountain Lion Mac OS X interface and buletproof UNIX rigidity. My brand spanking new 2017 15" MacBook Pro with Microsoft-like hung-anytime macOS Sierra goes back to Apple for a full refund. |